Last Updated: September 18, 2026
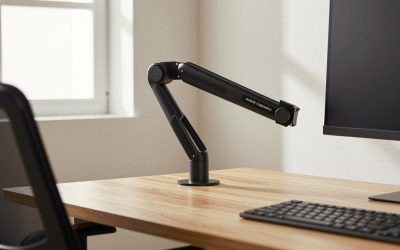
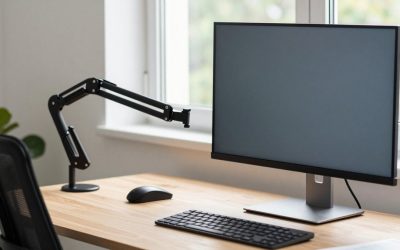
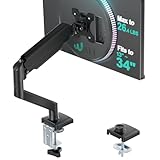
Monitor arms take more abuse than most desk accessories. Greasy fingerprints travel down from your screen, dust collects where the arm meets the desk clamp, and coffee splashes settle into every joint and spring. Done right, cleaning takes ten minutes and keeps the arm moving smoothly for years. Done badly — spraying cleaner directly into the joints, soaking the desk clamp, or yanking the arm while the monitor is still attached — you can strip internal tension springs, ruin the gas spring, damage your desk surface, or send a 10-pound monitor crashing down. This guide walks you through cleaning a monitor arm safely, whether it’s a basic mechanical model or a gas spring unit like the ErGear Single Monitor Arm ($26.99) that holds screens up to 19.8 lbs, or the WALI Adjustable Single Monitor Arm ($25.49) rated to 26.4 lbs.
What You Need
| Item | Why | Optional? |
|---|---|---|
| Microfiber cloths (2–3) | Lift dust and grease without scratching powder-coated or aluminum finishes | No |
| Mild dish soap | Cuts skin oils and grime when diluted in warm water | No |
| Warm water in a small bowl | Base for the soap solution; dampen cloths, never spray the arm | No |
| Rubbing alcohol (70% isopropyl) | Removes stubborn ink, sticker residue, and sticky spots on hard surfaces | Yes |
| Cotton swabs | Clean crevices around pivot bolts, VESA plate screws, and cable clips | Yes |
| Soft brush (toothbrush works) | Dislodges dust from spring coils, clamp teeth, and cable channels | Yes |
| Compressed air | Blows dust out of tight joints without disassembly | Yes |
| Silicone-based lubricant | Restores smooth pivoting on dry, squeaky joints (never use WD-40 on gas springs) | Yes |
| Second person or a soft towel on the desk | Supports the monitor while you work, especially for screens 27 inches and larger | Yes |
Step-by-Step
See also: How to Tighten a Loose Monitor Arm (2026): Step-by-Step • How to Install a Monitor Arm (2026): Step-by-Step
1. Decide whether to clean in place or detach the monitor (1 minute)
For a light dusting, leave everything mounted. For a deep clean, detach the screen first. Most arms — including the ErGear and WALI models — use a tool-free or quick-release VESA mount, so you can lift the monitor straight up off the plate in seconds. If your screen weighs more than 15 lbs or spans 27 inches or more, get a second person to help. Set the monitor face-down on a towel-covered surface.
As an Amazon Associate we earn from qualifying purchases at no extra cost to you.

2. Unplug and clear the cables (2 minutes)
Unplug the monitor’s power and video cables from the wall and computer. Release the cables from the arm’s cable management clips or channels — both budget arms mentioned above include integrated cable management along the arm spine. This lets you clean the full length of the arm instead of working around a cable nest, and prevents liquid from wicking into connector ports.
3. Dust the entire arm (2 minutes)
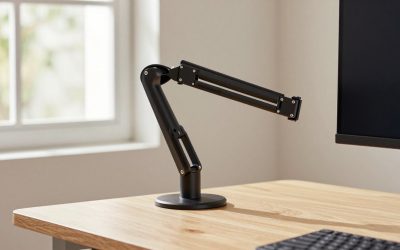
Wipe the arm from the desk clamp to the VESA plate with a dry microfiber cloth. Use the soft brush on spring coils, hinge knuckles, and the clamp’s adjustment screw threads. A short burst of compressed air clears dust from joints you can’t reach with a cloth.
4. Wash with soap solution (3–4 minutes)
Mix a few drops of dish soap into a bowl of warm water. Dip a microfiber cloth and wring it until it’s barely damp — it should never drip. Wipe down the pole, arm segments, clamp, and VESA plate. Pay attention to the desk clamp base, where dust and moisture create grime rings on the desktop. Follow with a second cloth dampened in plain water to remove soap residue, then dry everything with a clean cloth. Never spray liquid directly onto the arm or into joints.
5. Treat stubborn spots (1–2 minutes)
For ink marks, sticker residue, or sticky patches, dab a cotton swab in 70% isopropyl alcohol and work the spot gently. Test on a hidden area first — alcohol can dull some painted finishes. Avoid getting alcohol on rubber grips or plastic tension dials, which can dry and crack.
6. Clean the joints and pivot points (2 minutes)
Run a cotton swab around each pivot bolt and hinge. If a joint squeaks or feels gritty when it moves, apply a single small drop of silicone-based lubricant to the pivot, work the arm through its range of motion a few times, and wipe away the excess. Do not lubricate gas spring cylinders themselves — they’re sealed units, and introducing solvents can degrade the seals. If tension feels wrong, adjust the tension screw or dial per your arm’s manual rather than masking the issue with lubricant.
7. Clean the cables and desk contact points (2 minutes)
Wipe the monitor cables with a dry cloth as you re-route them through the clips. Check the clamp’s rubber or foam padding on the desk underside — grime here can mar the finish over time. Wipe the desktop area under and around the clamp before remounting.
8. Remount, retension, and test (2–3 minutes)
Reattach the monitor to the VESA plate and confirm it’s fully seated — a half-seated mount is the most common cause of screens slipping or tilting. Plug the cables back in. Move the arm through its full range: up, down, forward, back, and both rotations. If the screen drifts down or sags, increase spring tension in small increments — usually a quarter turn at a time. If it springs upward, decrease it.
Mistakes to Avoid
Spraying cleaner directly at the arm. Liquid runs into joints and pools in the clamp, causing corrosion and, near a powered monitor, electrical risk. Always apply cleaner to the cloth.
Using harsh solvents. Acetone, bleach, and ammonia-based cleaners can strip powder coating and cloud anodized aluminum. Stick to dish soap and water, with isopropyl alcohol reserved for spot treatment.
Cleaning a loaded gas spring arm without support. If you push or lean on an arm holding a heavy monitor, a sudden release can crack your screen. Detach heavy displays first.
Lubricating the gas spring cylinder. These are factory-sealed. Grease on the piston rod attracts dust and can damage seals. Only lubricate hinge pivots, and only with silicone-based product.
Overtightening bolts after cleaning. Snugging pivot bolts until the arm won’t move defeats the purpose of an adjustable arm. Tighten only until wobble stops.
Ignoring the desk clamp. Most grime-related desk damage starts at the clamp, not the arm. Clean the padding and check that the clamp screw still turns smoothly.
How Often
For most home offices, a quick dry dusting every 2–4 weeks is enough, since dust buildup in the joints is what eventually causes stiffness. Do the full soap-and-water clean every 3–6 months, or whenever you notice fingerprints, grime rings near the clamp, or sticky pivot points. Clean sooner if you eat at your desk, have pets that shed, or live in a dusty environment. If you’ve just moved the arm or adjusted tension, that’s a natural moment to wipe everything down while the arm is in your hands.
When to Call a Pro or Replace
Monitor arms are simple enough that professional repair is rarely worth it — labor on a $25–$30 arm costs more than a replacement. Replace the arm if you notice any of the following: a gas spring that won’t hold tension even after adjustment; visible oil leaking from the spring cylinder; cracked or stripped pivot threads; a clamp that won’t grip the desk securely; or a VESA plate that wobbles even with the bolts tightened. Sagging that persists after full tension adjustment usually means the spring is worn out or the monitor exceeds the arm’s weight rating — a common issue when users upgrade from a 24-inch screen (roughly 7–9 lbs) to a 34-inch ultrawide that can push past 20 lbs. Both the ErGear (19.8 lb capacity) and WALI (26.4 lb capacity) cover most consumer screens, but always match the rating to your actual monitor weight. Replacement arms in this category cost $20–$40 in 2026, so replacement usually beats repair.
FAQ
Can I clean a monitor arm without removing the monitor?
Yes, for routine dusting and light cleaning. Keep liquids well away from the monitor and cables, and avoid putting pressure on the arm. For deep cleaning or if your screen weighs over 15 lbs, detach the monitor first — most modern arms have tool-free VESA mounts that make this a 30-second job.
What should I not use to clean a monitor arm?
Avoid acetone, bleach, ammonia-based glass cleaners, and abrasive scrub pads — they damage powder-coated and anodized finishes. Skip WD-40 and standard grease, which attract dust and can ruin gas spring seals. A damp cloth with mild dish soap covers 95% of cleaning needs.
Why is my monitor arm squeaking after cleaning?
Cleaning can wash away residual lubricant in the pivot points. Apply one drop of silicone-based lubricant to each squeaky hinge, move the arm through its range several times, and wipe off excess. If the sound comes from the gas spring itself rather than a hinge, don’t lubricate it — the unit is sealed and may need replacement.
How do I keep my monitor arm clean longer?
Route cables neatly through the arm’s cable channels so dust has fewer places to catch. Wash your hands before long desk sessions to reduce oil transfer to the arm and screen. Keep food and drinks a few inches back from the arm’s base, and give the whole assembly a 30-second dry wipe whenever you dust your desk — small habits that stretch deep cleans to twice a year.
Related Reviews & Guides


Best Uperfect Portable Monitors in 2026: Compared and Ranked

Single Arm Monitor Mount