Last Updated: September 18, 2026
A monitor arm can free up desk space, improve screen height, and make it easier to switch between sitting and standing. But a rushed installation can leave your monitor tilting, wobbling, or slowly sinking. An overloaded arm may damage its gas spring, while an over-tightened clamp can mark or even crack a glass or particleboard desktop. The safest approach is to verify compatibility first, attach the arm to a solid surface, and adjust the tension only after the monitor is mounted.
This guide explains how to install a monitor arm in 2026, whether you are using a single- or dual-monitor mount with a desk clamp or grommet base.
As an Amazon Associate we earn from qualifying purchases at no extra cost to you.

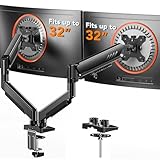
Quick answer: Our top pick in 2026 is the Monitor arm — our #1 rated choice. See the full ranked comparison, alternatives and buying advice below.
What You Need
| Item | Why | Optional? |
|---|---|---|
| Monitor arm | Choose a model rated for your screen size, weight, and VESA pattern. Common arms support 13- to 32- or 34-inch displays and up to about 19.8 pounds per arm. | No |
| Phillips screwdriver | Needed for most VESA screws and some base hardware. | No |
| Hex keys | Typically included with the arm; used for bolts, joints, and tension adjustments. | No, if included |
| Tape measure | Helps confirm desk clearance, monitor dimensions, and viewing distance. | Yes |
| Small level | Useful for checking whether the base and screen are straight. | Yes |
| Blanket or folded towel | Protects the display when it is face down during VESA installation. | Yes, but recommended |
| Stud finder or desk inspection light | Helps identify a sturdy mounting area and avoid weak, damaged, or hollow surfaces. | Yes |
Before buying or opening the package, check the monitor’s weight without its original stand. Confirm that the screen has a VESA mounting pattern, usually 75 by 75 millimeters or 100 by 100 millimeters. Also measure the desktop thickness. Many clamp bases work on desks roughly 0.4 to 3.3 inches thick, but the exact range varies by model.
Step-by-Step
See also: How to Clean a Monitor Arm (2026): Step-by-Step • How to Tighten a Loose Monitor Arm (2026): Step-by-Step
1. Check compatibility and clear the desk (5–10 minutes)
Remove the monitor’s original stand and weigh the display if its specifications are unclear. The arm’s capacity must exceed the monitor’s weight, and the rating for a dual arm usually applies to each screen—not the combined weight unless the manufacturer specifically says otherwise.
Check the back of the monitor for four threaded mounting holes. Avoid forcing screws into them. Use the screw size and spacers supplied with the arm, and make sure the screws are not so long that they contact internal components.
Clear the rear edge of the desk and look underneath. Avoid mounting directly over a cable tray, drawer, thin decorative lip, or damaged wood. Leave room for the clamp to sit flat and for the arm to move without hitting a wall.
2. Choose a clamp or grommet position (5 minutes)
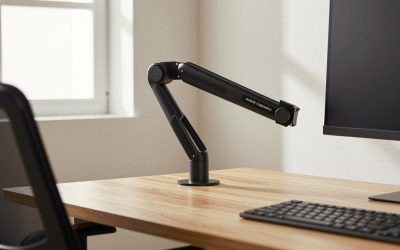
A desk clamp is the simplest option and usually attaches to the back or side edge. Position it where the desktop is strongest and where the arm can swing without striking a wall or shelf. For a single monitor, the center of the desk is often convenient. For two monitors, placing the base slightly off-center may provide better range of motion.
A grommet mount passes through an existing cable hole or a hole drilled into the desktop. Use it only where the hole diameter and desk thickness match the arm’s requirements. Do not drill through a tempered-glass desk; glass desktops generally require a manufacturer-approved mounting solution or a separate freestanding base.
3. Assemble and secure the base (10–15 minutes)
Follow the arm’s assembly order, keeping washers and bolts together. Attach the clamp plate or grommet hardware to the base, but do not fully tighten everything until the base is sitting in its final position.
Set the base squarely against the desk edge. Tighten the lower screw or handle gradually, alternating between sides if the design has more than one fastener. The clamp should be snug enough that the base cannot shift when you apply moderate hand pressure. It should not crush the desktop or bow the surface.
If the desk is particleboard, MDF, or has a thin top, place a broad protective pad beneath the clamp when the manufacturer allows it. A larger contact area spreads pressure better than a small metal foot. Recheck the base after a few minutes; soft materials can compress slightly.
4. Attach the arm sections (5–10 minutes)
Insert the vertical post, pole, or arm segments into the base and install the retaining screw or collar. Keep the arm folded and close to the desk while working. This reduces leverage on the clamp and makes the assembly easier to control.
Do not remove a safety stop or transport clip until the instructions say to do so. Gas-spring arms can move suddenly when released. Keep fingers away from joints and hinges while adjusting the mechanism.
5. Attach the VESA plate to the monitor (10 minutes)
Place a folded towel on the desk and lay the monitor face down gently, supporting the screen rather than pressing on the panel. Remove any plastic cover from the VESA holes and position the mounting plate with the correct side facing outward.
Start all four screws by hand. Tighten them evenly in a diagonal pattern until the plate is secure. Stop when the plate is firmly seated. Over-tightening can strip the threads or damage the monitor housing. If the supplied spacers are needed to clear a recessed mounting area, install them before tightening the screws.
6. Hang the monitor and adjust tension (10–15 minutes)
With one hand supporting the monitor, attach the VESA plate to the arm’s quick-release bracket or mounting head. Confirm that the locking screw, latch, or safety tab is engaged before letting go. For a larger display, have another person support the screen.
Move the arm slowly into position. If it rises, drops, or will not hold level, use the supplied tension key to adjust the gas spring or joint. Turn the adjustment in small increments—about one-quarter turn at a time—then test the screen. A heavier monitor generally needs more tension; a lighter one needs less. Never force an adjustment screw that has reached its stop.
Set the screen so your eyes are approximately level with the upper third of the display when sitting upright. A viewing distance of about 20 to 30 inches works for many 24- to 32-inch monitors, though resolution, eyesight, and personal comfort matter more than a fixed rule.
7. Route cables and test the full range (10 minutes)
Connect the power and video cables with enough slack for the arm to move. Use the built-in clips or sleeves, but do not pack cables so tightly that they pull on the ports. Leave a gentle loop near the monitor and near the desk.
Test height, tilt, swivel, and rotation slowly. Make sure the arm does not pull the desk toward the wall, lift the clamp, pinch a cable, or collide with another monitor. Check that the display stays in place when you release it. Finally, confirm that the desk clamp and all visible fasteners remain tight.
Mistakes to Avoid
- Ignoring the weight limit: Include the monitor, any attached adapter, and accessories that hang from the VESA plate.
- Assuming all VESA mounts fit: Verify both the pattern and screw depth. A 75-by-75-millimeter mount is not automatically compatible with a 100-by-100-millimeter screen.
- Mounting to a weak surface: Avoid hollow-core desks, thin shelves, glass, and damaged particleboard unless the manufacturer provides a suitable reinforcement method.
- Over-tightening the clamp: Secure does not mean crushing. Stop when the base is stable and the desktop is not visibly bending.
- Skipping tension adjustment: A screen that slowly sinks or springs upward needs adjustment before continued use.
- Routing cables too tightly: Limited slack can damage HDMI, DisplayPort, USB, or power connections during movement.
- Using the wrong screws: Screws that are too long may damage the monitor; screws that are too short may not hold securely.
How Often
Inspect the clamp, base, joints, and VESA screws after the first day of use, again after one week, and then every three to six months. Check sooner if you frequently reposition the arm, move the desk, or attach and remove monitors.
At each inspection, look for a shifting base, loose hardware, cracked desktop material, sagging, unusual clicking, or cables under tension. Clean dust from joints and cable channels with a dry cloth. Do not lubricate a gas spring unless the manufacturer specifically recommends it.
When to Call a Pro or Replace
Ask a professional for help if you need to drill through a thick or finished desktop, mount to a wall, work with a glass surface, or reinforce a damaged desk. A professional can also help when the mounting area is difficult to access or the screen is unusually large and heavy.
Replace the arm if the gas spring leaks, the joints remain loose after tightening, the base bends, the clamp slips under normal use, or the VESA plate is cracked. Stop using it immediately if the monitor drops, tilts suddenly, or pulls the desk edge upward. A typical single arm may cost roughly $27 to $35 for basic models, while a dual arm in that range can support two compatible screens; replacing a questionable mount is cheaper than replacing a monitor or damaged desk.
FAQ
Can I install a monitor arm on any desk?
No. The desk must be thick and strong enough for the clamp or grommet hardware, with a solid mounting area. Thin, hollow, cracked, or glass desktops may need reinforcement or a freestanding monitor stand instead.
Do I need a VESA-compatible monitor?
Usually, yes. Most monitor arms attach through four VESA holes, commonly 75 by 75 or 100 by 100 millimeters. A non-VESA monitor may work with an adapter, but only if the adapter and arm are rated for its size and weight.
Why does my monitor arm keep sinking?
The tension is likely set too low for the monitor’s weight, or the screen exceeds the arm’s capacity. Adjust the tension gradually using the included tool. If the arm still sinks at its maximum setting, replace it with a properly rated model.
Can I use one dual arm for two different-size monitors?
Often, yes, provided each monitor fits the VESA range and stays under the per-arm weight limit. Balance the screens evenly, adjust each arm separately, and confirm that the base remains stable when both monitors are extended or angled.
Ready to decide? Our #1 pick for 2026 is the Monitor arm.
Live price & availability on Amazon.
Related Reviews & Guides


Best Triple Screen Portable Monitors in 2026: Compared and Ranked
6 Best Ergonomic Stand Monitors 2026