Last Updated: October 18, 2026
- What OctoPrint actually needs from a webcam
- What to look for before you buy
- Quick comparison: which type suits which setup
- Best cheap option: basic fixed-focus 1080p webcam
- Best for nozzle close-ups: manual-focus or good autofocus
- Best for enclosures and dark rooms: wide view plus light
- Setup mistakes that cause most OctoPrint camera failures
- FAQ
📄 In This Review
- What OctoPrint actually needs from a webcam
- What to look for before you buy
- Quick comparison: which type suits which setup
- Best cheap option: basic fixed-focus 1080p webcam
- Best for nozzle close-ups: manual-focus or good autofocus
- Best for enclosures and dark rooms: wide view plus light
- Setup mistakes that cause most OctoPrint camera failures
- FAQ
What OctoPrint actually needs from a webcam
OctoPrint doesn’t need a good-looking webcam in the video-call sense. It needs a reliable, always-on USB camera that can sit 15-40 cm from a hot, vibrating printer for hours, deliver a sharp image in poor light, and reconnect without fuss after a reboot. Skin tones, background blur, noise-canceling mics and 60 fps don’t matter here. Focus behavior, low-light performance, field of view, and Linux compatibility matter a lot.
Most people use OctoPrint on a Raspberry Pi 3B+, Pi 4, or Pi 5. That limits you to cameras that work as standard UVC USB devices or native Pi cameras. If a webcam needs a Windows app to enable 1080p, set focus, or turn off auto-effects, avoid it. You won’t have that app on the Pi, and OctoPrint will get stuck with whatever default the camera boots into.
What to look for before you buy
See also: Best Monitor for MacBook Air: Two USB-C 4K Screens and Six Adapter-Dependent Alternatives • Best Monitor for MacBook Pro: Eight Listings Sorted by Cable, Sharpness and Scaling
Focus type is the biggest decision. Fixed-focus cameras are sharp from about 30 cm to infinity but blurry up close. Autofocus cameras can lock onto a nozzle from 10-15 cm, which is great for first-layer checks, but cheap autofocus will hunt and pulse every time the print head moves or the lighting changes. For a close-up nozzle cam, manual-focus is actually ideal because you set it once and it never drifts.
Resolution is secondary to lens and light. A clean 720p image with good exposure beats a noisy, compressed 1080p stream. OctoPrint typically streams MJPEG at 10-15 fps to keep Pi CPU load low. Running full 1080p at 30 fps on a Pi 3 will often cause stutter, laggy controls, or disconnects. Plan on 1280×720 for monitoring and only go higher if you have a Pi 4 / Pi 5 and good cooling.
Field of view and mounting determine usability. A narrow 60-70 degree lens is better for a close nozzle view inside an enclosure. A 78-90 degree lens is better for watching the whole bed from the top corner of a Lack enclosure or shelf. Ultra-wide 120-degree action-cam views look impressive but make it hard to see layer defects. Also check for a standard tripod thread. Clip-only work webcams are annoying to mount to 2020 extrusion or a gooseneck arm.
Low light will make or break it. Printers sit in garages, closets, and under desks. A camera with a larger sensor and decent auto-exposure will still show the print in a dim enclosure. A tiny-sensor cheap cam will go black with IR glare. If your printer is enclosed, budget for a small USB LED bar as well as the camera. It improves image quality more than paying extra for 4K.
Quick comparison: which type suits which setup
| Type | Best for | Strengths | Weaknesses |
|---|---|---|---|
| Budget 720p / 1080p fixed-focus USB webcam | Whole-bed monitoring from 50cm+ away | Cheap, plug-and-play UVC, no focus hunting, low CPU load | Blurry for nozzle close-ups, poor in dark enclosures |
| Mid-range 1080p autofocus USB webcam | Small rooms, Ender 3 / Prusa MK4 on a desk | Sharper up close, better low light, good for dual use with Zoom | Focus can pulse, uses more Pi CPU at 1080p, needs light |
| Manual-focus board / Pi camera with flex cable | Nozzle cam, inside enclosure, timelapses | Set-and-forget focus, small, lightweight, great timelapses | Short ribbon cable, more setup, fragile mount |
| Wide-angle 90-degree+ webcam on gooseneck | Large printers, Voron / Bambu-size beds, top-down view | Sees whole bed, flexible positioning | Edges distort, fine detail smaller, needs good lighting |
Best cheap option: basic fixed-focus 1080p webcam
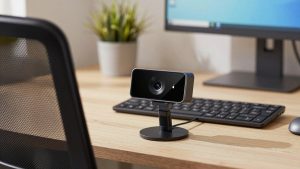
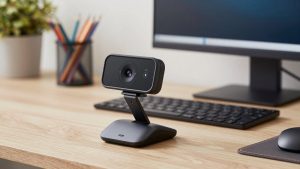
For most people watching a single bed-slinger from a shelf, the cheaper option is fine. A basic 1080p fixed-focus webcam for OctoPrint costs little, shows up immediately as /dev/video0, and works with the standard camera streamer or mjpg-streamer settings.
Mount it 60-100 cm back, set resolution to 1280×720 at 10 fps in OctoPrint’s streamer config, and leave autofocus off because there is none to hunt. The trade-off is close detail: you will see that a print failed and became spaghetti, but you won’t clearly see first-layer squish from across the room. That’s fine for spaghetti detection, checking progress from work, and sharing a link with friends.
Failure mode to know: these cheap lenses fog slightly in a heated enclosure above 40C and the plastic clip loosens with vibration. Mount it outside looking through acrylic if you print ASA or ABS hot, and use a dedicated tripod mount or printed holder rather than balancing it on filament spools.
Best for nozzle close-ups: manual-focus or good autofocus
If your main goal is dialing in Z-offset, watching extrusion, or catching first-layer lifting, you need a camera 15-30 cm from the nozzle. This is where fixed-focus office webcams fail – they go soft exactly where you need sharpness.
You have two workable paths. One is a small board-style camera with a twist-to-focus lens that you set once with OctoPrint’s focus test. The other is a mid-range 1080p autofocus USB webcam with manual focus control where you can disable continuous autofocus in v4l2 after initial lock. Both give you a stable close-up without pulsing every 5 seconds.
Who this suits: Prusa, Ender, and Voron owners who tinker a lot and make timelapses. Who should skip it: if you just want a yes/no is it still printing view, the extra setup isn’t worth it. Close-up cams also get dirty fast from fan dust and need a wipe every few weeks, and ribbon cables for Pi-native cameras crack if you bend them repeatedly on a moving gantry – route with slack and strain relief.
Best for enclosures and dark rooms: wide view plus light
Inside a Lack enclosure or closet, field of view and exposure matter more than megapixels. A 78-90 degree webcam mounted top-front looking down at 45 degrees sees the whole bed plus the spool without moving. Pair it with a cheap daylight LED strip powered separately, not from the Pi’s USB, to avoid brownouts.
A flexible wide angle webcam with tripod mount and gooseneck stand is easier to aim than a clip-on work webcam. Look specifically for a metal 1/4-inch thread, UVC compliance, and a lens that doesn’t force beauty filters or auto-crop you can’t turn off on Linux.
Concrete trade-off: wide lenses shrink detail. A 0.4mm nozzle gap problem that fills the frame on a nozzle cam will be 20 pixels wide here. Run this cam at 720p for live monitoring and add a second close cam later if you need both views – OctoPrint with camera-streamer handles multicam better than trying to make one camera do everything.
Setup mistakes that cause most OctoPrint camera failures
First, power. The Pi’s USB ports share limited power. A webcam plus LED ring plus USB-powered printer board on a weak phone charger leads to undervoltage throttling and camera disconnects mid-print. Use the official Pi power supply and power lights separately.
Second, cable length. Passive USB extensions over 2 meters cause dropouts, especially at 1080p. Use a short, good-quality cable to the Pi and run a longer Pi camera ribbon or put the Pi closer to the printer instead of extending USB across the room.
Third, CPU load. Don’t start at 1920×1080 at 30 fps YUYV. Start at 1280×720 at 10-15 fps MJPEG. If that is smooth for a full print, then try higher. High resolution without enough light just gives you a larger dark, blurry image and a hot Pi.
FAQ
Can I reuse my work-from-home webcam for OctoPrint?
Yes, if it’s a standard UVC plug-and-play model with no required Windows app. Test it on the Pi with lsusb and a quick streamer test before printing a mount. If you need to install vendor software to unlock focus or 1080p, it won’t work well headless.
Do I need 4K for OctoPrint?
No. OctoPrint streams compressed video for monitoring, not archival recording. 720p with good light and stable focus shows failures clearly. 4K quadruples bandwidth and Pi load and often forces lag. Spend the difference on lighting and a solid mount.
Why is my image blurry up close but sharp far away?
That’s fixed focus. Most cheap webcams are factory-focused at 60 cm and beyond. For nozzle views under 30 cm you need manual focus or an autofocus model you can lock. Move the camera back for whole-bed views rather than fighting physics.
Pi camera or USB webcam – which is more reliable?
USB UVC webcams are simpler to set up and easier to reposition. Pi ribbon cameras are smaller and great for lightweight toolhead or inside-enclosure mounts and timelapses, but the cable is fragile and short. For a first OctoPrint camera on a desk printer, USB is usually less hassle.