Last Updated: October 18, 2026
If you are on Zoom, Teams, or Google Meet a few hours a day and just need to look and sound clear, you do not need to spend much. Most low budget webcams now do 1080p, handle office lighting acceptably, and work plug-and-play on Windows and Mac.
The catch is that budget models cut corners in the same places: small sensors that get noisy in dim rooms, cheap microphones, basic fixed focus, and flimsy mounts. Knowing which corner you can live with is how you pick the right cheap one.
📄 In This Review
What a low budget webcam actually gets you
Expect to pay roughly $20 to $45. In that range you typically get 1080p at 30fps, a 65 to 80 degree field of view, one or two built-in mics, and a clip that fits a laptop lid or external monitor. No software required — you plug it into USB-A and select it in Zoom or Teams.
What you do not get is good low-light performance. In a bright home office near a window, a $30 camera can look surprisingly sharp. In a basement office or evening call with only a ceiling light, that same camera will look grainy, soft, and a little laggy as it drops exposure to gather light. Autofocus is also rare at the very bottom of the market. Most cheap models are fixed-focus, meaning you are sharp from about 2 feet to 8 feet away and slightly soft if you lean in very close.
For many work calls, that is fine. Your face is a small box on someone else’s screen. Clear lighting and a stable mount matter more than sensor specs.
What to check before you buy
See also: Best Monitor for MacBook Air: Two USB-C 4K Screens and Six Adapter-Dependent Alternatives • Best Monitor for MacBook Pro: Eight Listings Sorted by Cable, Sharpness and Scaling
Focus type matters more than megapixels. Fixed-focus is actually good if you sit still at a desk — there is nothing to hunt or pulse during a call. Autofocus is better if you move around, whiteboard, or hold products up to the camera, but cheap autofocus can breathe in and out. If you buy autofocus on a budget, check reviews specifically for focus hunting on video calls, not just photos.
Field of view is the second trap. Very wide 90+ degree budget cameras sound good but make you small and show your whole messy room. For a laptop or single-person home office, 65 to 78 degrees is better. You fill the frame and get less edge distortion.
Microphones are where cheap webcams fail most often. They pick up keyboard clatter, fan hum, and room echo. They are usable for a 1:1 check-in, but for all-day meetings you will be clearer with laptop mics, wired earbuds, or a cheap headset. Do not buy a budget webcam for its mic alone.
Mount and cable are practical failure modes people ignore. Lightweight clips slip on thin MacBook lids or curved gaming monitors. A short 3-foot cable is annoying if your dock is under the desk. Look for a tripod thread on the bottom — it lets you put the camera on a small tripod at eye level, which looks far more professional than staring up your nose from a laptop.
Three budget approaches that work for work calls
Rather than chasing one perfect model, pick based on how you call. These three categories cover almost everyone shopping under $45:
| Type | Best for | Strengths | Weaknesses |
|---|---|---|---|
| Basic 720p / 1080p fixed-focus | Students, second PC, occasional calls | Cheapest, no focus issues, simple plug-and-play | Noisy in low light, narrow dynamic range, basic mic |
| 1080p fixed-focus with privacy shutter | Home office, shared house, Mac users | Better lens coating, physical shutter, more stable clip | Still needs good light, USB-A may need adapter for MacBook |
| 1080p autofocus with dual mics | Moving presenters, customer-facing calls | Sharper close-ups, better audio pickup, wider compatibility | Focus can hunt, larger body, costs near $40-45 |
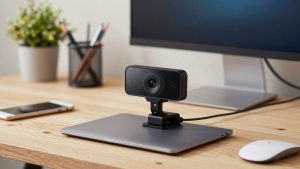
1. The simplest fixed-focus camera. If you take two to three calls a week from a well-lit desk and your laptop camera is broken or looks waxy, this is enough. Image is usually sharper than a 3-year-old built-in laptop camera because the lens is larger and not covered in fingerprints. Sit facing a window or put a $15 desk lamp behind your monitor and you will look better than most coworkers. Skip this type if you call at night with dim lamps — you will look grainy no matter what the box claims about low-light correction.
A basic 1080p fixed focus webcam is the cheapest fix for a dead or terrible laptop camera, and there is no shame in stopping here.
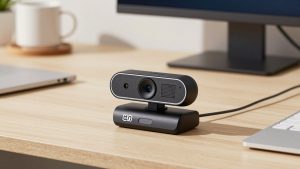
2. Fixed-focus with a real privacy shutter. This is the sweet spot for most home office workers. You get the same reliable focus as above, but usually a better mount, a physical shutter you can slide closed, and slightly better color. The shutter matters if your camera lives on your monitor in a bedroom or shared space — tape over the lens works, but it gums up the lens and looks bad on calls.
Mac users: almost all of these are UVC compliant, so they work on macOS in Zoom, Teams, Meet, and Photo Booth with no driver. You just may need a USB-C adapter since most still ship with USB-A. Also ignore any Windows-only effects software on the box; you will not get background blur from the vendor app on a Mac, use the blur built into Teams or Zoom instead.
Look at a 1080p webcam with privacy shutter if you want set-and-forget for daily standups.
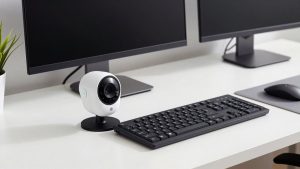
3. Budget autofocus with dual microphones. Choose this only if you lean in, lean back, or show paperwork to the camera. Single-mic budget cameras get very quiet when you move back; dual-mic models hold volume better. The trade-off is focus hunting. On some cheap autofocus units the background pulses every 10-15 seconds when a ceiling fan moves or light changes. If you sit still, fixed-focus will actually look more stable.
This type also tends to have a wider 80-90 degree lens. That is helpful on a desktop monitor where you sit farther back, but too wide on a laptop at arm’s length. Check if the seller lists a 75-degree mode or use Zoom’s crop to tighten it.
A low-cost 1080p autofocus webcam with dual mic suits tutors, sellers, and support staff who move during calls.
Setup matters more than the camera
A $25 webcam in good light beats a $90 webcam backlit by a window. Put your brightest light source in front of you, not behind you. If coworkers say you are a silhouette, close the blinds behind you or move your desk 90 degrees to the window.
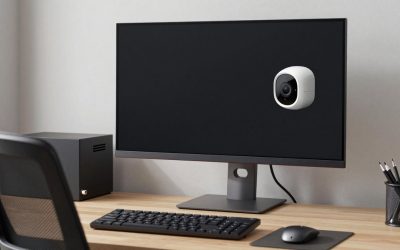
Raise the camera to eye level. Stacking a laptop on books works, but an external budget camera on top of a 27-inch monitor is already close to ideal. If you use a laptop on a stand with an external keyboard, clip the external webcam to the external monitor, not the laptop off to the side — looking off-camera all meeting reads as distracted.
Common failure modes to test in the first week: buzzing from USB power when plugged into an unpowered hub, echo when you use external speakers plus the webcam mic, and Teams defaulting back to the laptop camera after reboot. Plug directly into the laptop or powered dock, use headphones or a headset for audio, and lock the camera choice in your meeting app settings.
When cheap is fine and when to spend more
Cheap is fine if your calls are mostly internal, your room is bright, and you use separate audio. Do not overthink it.
Spend more if you are client-facing all day, present in low light, or need to look sharp on recorded trainings. The next step up — usually $60 to $100 — buys you a larger sensor, better auto-exposure, and usable background blur without a green screen. It does not buy you better built-in audio worth relying on; even expensive webcams lose to a $30 headset for voice clarity.
FAQ
Will a budget webcam work on MacBook without software?
Yes. Almost all current USB webcams use the UVC standard and work on macOS Ventura, Sonoma, and Sequoia in Zoom, Teams, Meet, and FaceTime. You may need a USB-C to USB-A adapter. Vendor image controls are often Windows-only, so adjust exposure in your meeting app.
Is 720p enough for work calls?
For small gallery-view meetings, yes. Most meeting apps compress you to 720p or less anyway. 1080p helps if you are pinned full-screen, record training, or crop in. Good lighting makes a bigger difference than 720p versus 1080p on a cheap sensor.
Why do I look grainy even with a 1080p camera?
Almost always low light. Small budget sensors boost gain in dim rooms, which creates noise. Add a lamp in front of you, turn up room lights, and turn off auto low-light boost if your app offers it. Sitting farther from a dark wall also helps auto-exposure.
Should I use the webcam mic or a headset?
Use a headset or earbuds for anything longer than 15 minutes. Budget webcam mics sound thin and pick up typing and echo. Keep the webcam mic as a backup in your audio settings in case your headset battery dies.