Last Updated: October 18, 2026
📄 In This Review
Why a bright background breaks most webcams
A bright window or white wall behind you is the hardest scene for a small webcam sensor. The camera sees a huge patch of brightness and exposes for that, so your face goes dark. You get the classic silhouette effect: background is white and blown out, you are underexposed, and your expression is unreadable on Zoom or Teams.
This is not fixed by buying more resolution. A cheap 4K sensor will make the same mistake in sharper detail. What matters is how the webcam measures light and how much dynamic range it has — its ability to hold detail in both the bright window and your darker face at the same time. If you sit with your back to a sunny window every day, that one capability decides whether you look professional or like a shadow.
What actually helps: HDR, backlight compensation, and manual control
See also: Best Monitor for MacBook Air: Two USB-C 4K Screens and Six Adapter-Dependent Alternatives • Best Monitor for MacBook Pro: Eight Listings Sorted by Cable, Sharpness and Scaling
Three features matter for bright backgrounds. First is true HDR or wide dynamic range. Instead of taking one exposure, the webcam blends a bright and dark exposure together. Done well, it keeps the window from blooming into a white blob while lifting your face. Done poorly, it looks artificial and adds lag, so implementation matters more than the HDR label.
Second is backlight compensation and face-based auto-exposure. Good business webcams will detect a face and expose for the face, not the average of the whole frame. Cheaper webcams expose for the whole frame, which is why the window wins. Look in the software settings for terms like backlight compensation, WDR, HDR, face / people exposure, or auto-exposure priority.
Third is manual exposure control in the app. This is underrated. If auto-exposure keeps pumping up and down every time a cloud passes, locking exposure and gain manually gives you a stable image. On Mac especially, check that the webcam has a usable macOS app or works with Camera Settings, OBS, or your meeting app controls. Some Windows-only software leaves Mac users stuck on full auto.
Which type to buy for a bright room
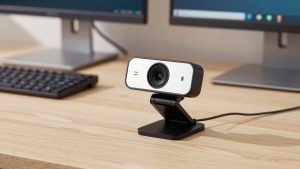
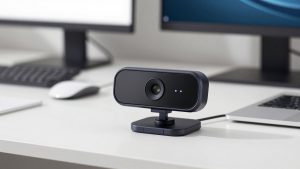
For a permanent work-from-home desk facing a window behind you, get a higher-end 4K business webcam with HDR and a larger sensor. These handle mixed light far better than basic 1080p sticks, and the extra resolution helps because you can crop in slightly without falling apart. A 4K webcam with HDR for video calls is the safest pick if you cannot move your desk and the background will always be bright.
The trade-off is price and processor load. HDR at 4K/30 can run warm and use more CPU, and on older laptops you may need to run it at 1080p to keep fans quiet. Autofocus can also hunt if you lean in and out with strong backlight. The failure mode here is over-smoothing: some HDR webcams lift shadows so aggressively that your face looks flat and grainy in a dim room at night. If you work days and nights in the same spot, make sure you can turn HDR down or off.
For occasional bright backgrounds — a laptop at a kitchen table, a rental, a hot-desk — a mid-range 1080p webcam with backlight compensation is often enough. You will still need to help it by closing a sheer curtain or angling yourself 45 degrees to the window, but you will not be a silhouette. A 1080p webcam with backlight compensation is fine for Teams and Meet if your face is lit with even a small desk lamp.
Be honest about the cheaper option: if you can reposition, you do not need HDR. Moving so the window is to your side or in front of you does more than any sensor upgrade. A $50 to $80 webcam with decent auto-exposure plus a $25 lamp in front of you will beat a $200 HDR webcam shot directly into full sun. Buy HDR because you cannot change the room, not because it sounds better.
Quick comparison
| Webcam type | Handles bright window behind you | Strengths | Weaknesses | Best for |
|---|---|---|---|---|
| 4K business webcam with HDR / WDR | Good to very good | Holds window detail, exposes for face, better in mixed light | Costs more, can look processed, heavier CPU load | Fixed home office with window you cannot block |
| Mid-range 1080p with backlight compensation | Acceptable with curtain or lamp | Cheaper, lighter on laptop, simpler software | Face still dark in direct sun, background will blow out | Hybrid workers, laptops, students |
| Basic 1080p fixed-exposure webcam | Poor | Cheap, plug-and-play | No HDR, exposes for background, noisy when lifting shadows | Only if window is in front of you, not behind |
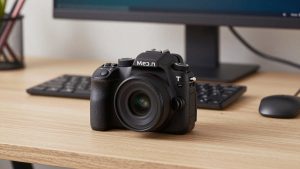
| Large-sensor USB camera / camcorder as webcam | Very good if set manually | Best dynamic range, manual exposure and white balance | Expensive, bulkier, needs USB capture or clean HDMI, more setup | Creators and managers on video all day |
Setup that matters more than the model
Even the best webcam for bright background will fail if you sit 10 feet away with a floor-to-ceiling window behind you at noon. If you can change anything, do this first: put a sheer white curtain or frosted blind over the window. It cuts 2 to 3 stops of glare without making the room dark, and every webcam instantly improves.
Next, add light on your face. You do not need a studio panel. A small daylight-balanced LED lamp bounced off a wall, or a clip light behind your monitor at 30 to 40% brightness, raises your face to match the background. That reduces the contrast the sensor has to handle. Avoid a warm orange desk bulb alone — mixed color temperatures make auto white balance swing green or magenta.
In software, turn off auto-framing if the exposure pulses when you move. Set exposure to face priority if available, then lower exposure compensation by -0.3 to -0.7 and raise shadows slightly instead. On MacBooks, test in FaceTime, Zoom, and Teams separately, because each app applies its own auto-exposure on top of the camera. If one app looks darker, lock settings in the webcam utility first, then let the meeting app run on auto.
What to avoid
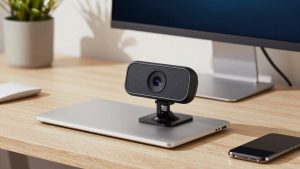
Avoid tiny travel webcams with no companion app and no exposure controls if backlight is your daily problem. They are fine for a hotel room with curtains closed, but they have no way to tell the camera to ignore the window. Also avoid “HDR” that only works in still photo mode or only at 4K/15 — check that HDR or WDR works at 1080p/30, which is what you will actually use for calls.
Avoid stacking fixes: HDR maxed out plus background blur plus low-light boost plus auto white balance lock often creates flicker and halos around your hair when the background is bright. Pick one main correction. For most people that is HDR on low or medium with face exposure on, then add physical light. If you need background blur for privacy, use a subtle blur rather than full replacement, which tends to shimmer around edges in backlight. A small LED video light for home office use usually solves more than upgrading the webcam a second time.
FAQ
Should I sit facing the window or with my back to it?
Face the window or put it to your side whenever possible. Front light is flattering and easy for any webcam. Backlight forces the sensor to choose between you and the window, and even HDR has limits in direct sun.
Is 4K necessary for a bright background?
No. Dynamic range and exposure control matter more than pixels. Buy 4K if you want cropping flexibility and a generally newer sensor with better HDR, but a well-tuned 1080p webcam with backlight compensation and a lamp on your face often looks better than 4K on full auto.
Why does my face still flicker bright and dark?
That is auto-exposure reacting to clouds, blinds, or you moving. Turn on face-priority exposure if available, reduce auto-exposure speed if the app allows it, or lock exposure manually during the call. Closing sheer curtains stops most of the pumping.
Does background blur help with bright windows?
Sometimes. Blur hides a blown-out window, but edge detection struggles in strong backlight and can flicker around hair and glasses. Fix exposure first with HDR and front light, then add light blur only if you still need it.