Last Updated: October 18, 2026
If you are on a Mac and shopping for a 4K camera, the resolution number is the least important part. What matters is whether it works cleanly with macOS, how it handles your office light, and whether the microphone, framing, and focus behave on Zoom, Teams, Meet, and FaceTime without fiddling every morning.
Most Mac users are better off with one of three paths: a true 4K USB webcam, an iPhone used as a Mac webcam via Continuity Camera, or a mirrorless camera used as a webcam. They look very different in practice, and 4K alone does not tell you which will look better on a call.
📄 In This Review
What a Mac actually needs from a 4K camera
Macs are picky in specific ways. There is no driver installation like on Windows. If a camera needs a Windows-only app to unlock 4K, background blur, or firmware updates, you will be stuck at whatever the default UVC mode gives you. Before you buy, check that 4K, autofocus, and any AI framing work over standard USB Video Class with no app, or that the vendor has a real Mac app that is maintained for Apple Silicon.
Port and hub behavior matters too. Many 4K webcams want USB 3.0 bandwidth and more power than a bus-powered dongle provides. If you plug into a cheap adapter with an external monitor, hard drive, and webcam on the same hub, you will often drop to 1080p, get stutter, or get a black screen in Teams. A direct port on the Mac or a powered USB-C hub solves most of these mystery failures.
Software matters as much as the sensor. Zoom and Teams still deliver most calls at 720p to 1080p to save bandwidth. A 4K sensor helps because it gives you sharper downscaled 1080p, better digital zoom and auto-framing without mush, and cleaner detail on screen shares and recordings. Do not buy 4K expecting the other person to see full 4K.
The 3 realistic options, compared
See also: Best Monitor for MacBook Air: Two USB-C 4K Screens and Six Adapter-Dependent Alternatives • Best Monitor for MacBook Pro: Eight Listings Sorted by Cable, Sharpness and Scaling
Forget the spec sheets for a minute. Here is how the categories actually compare for daily Mac work:
| Option | Image on a call | Mac setup | Best for | Watch out for |
|---|---|---|---|---|
| Premium 4K USB webcam with autofocus | Sharp, consistent, good auto-exposure | Plug-and-play if UVC compliant; check Mac app support | Daily Zoom/Teams, home office | Wide-angle distortion; needs good light to avoid noise |
| iPhone as webcam via Continuity Camera | Often best detail and low-light, especially Portrait / Desk View | Wireless or USB to macOS Ventura or later; mount needed | MacBook users who already own a recent iPhone | Battery drain, mount wobble, mic handoff quirks |
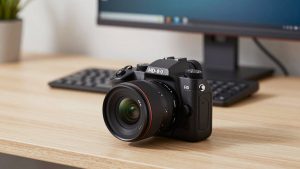
| Mirrorless camera + capture device as webcam | Most natural background blur and skin tones | Needs HDMI-to-USB capture, dummy battery, tripod | Presenters, YouTube, high-stakes calls | Overheating, timeouts, complexity, cost |
| Budget 4K USB webcam, fixed focus | Fine in good light, soft in low light | Usually plug-and-play | Occasional calls, second desk | Fixed focus means you must sit at right distance; weak mics |
1. A premium 4K USB webcam is the safe default
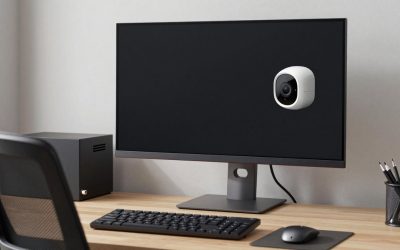
For most home offices, this is what to buy. Look for a 4K webcam for Mac with autofocus, a 1/2-inch class sensor or larger, dual noise-reducing mics, and a physical privacy shutter. Autofocus matters more than 4K on paper. Fixed-focus 4K cameras look fine if you sit exactly 2-3 feet away, but lean in to read something and you go soft.
Trade-offs: most premium models default to a very wide 90-degree field of view. That is good for whiteboard sessions and bad for a small bedroom office because it shows everything and makes you tiny. Choose a model that lets you set 65-78 degrees and have it stay set after reboot on Mac. If that setting only sticks in Windows, skip it.
Failure modes I see often: auto-framing that wanders during a call, hunting focus when you gesture with your hands, and over-sharpened faces under overhead LEDs. Turn on anti-flicker at 60Hz if you see banding, lock exposure if your window is behind you, and sit facing the light, not under it. The cheaper fixed-focus option is honestly fine if you take 2-3 calls a week in a bright room and use AirPods or a headset mic anyway.
2. An iPhone you already own often beats a new webcam
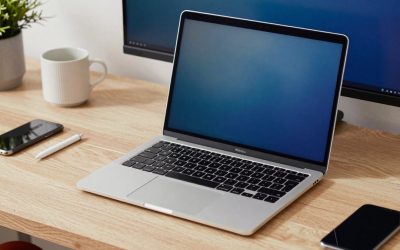
If you have a recent iPhone and a Mac running Ventura or later, try Continuity Camera before you spend anything. Mount the iPhone on top of your monitor, connect via USB for reliability, then select it as the camera in Zoom or Teams. Detail, dynamic range, and low-light performance are usually better than any sub-$200 webcam, and Center Stage and Desk View are genuinely useful for demos.
Who it suits: MacBook and Mac mini users who want the best image for zero dollars and do not mind a small daily setup. Who should skip it: anyone who takes back-to-back calls all day. The phone gets hot, notifications can interrupt if you do not enable Do Not Disturb, and the mount can slip on thin laptop lids. Wireless mode also adds slight latency and occasional disconnects. Wired USB is noticeably more stable.
Practical tip: use the iPhone for video only and a dedicated headset or USB mic for audio. Continuity mic handoff is the most common source of “can you hear me?” delays when you switch apps mid-call.
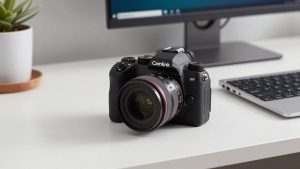
3. A mirrorless camera is best-looking, but rarely worth it for work
A real camera with a fast prime lens gives you what no webcam can: clean background separation without fake blur edges, accurate skin tones, and no noise in a dim room. But it is a system, not a product. You need a tripod or arm, HDMI capture, continuous power, and a camera that does clean HDMI without overheating or auto-shutoff after 30 minutes.
For internal standups, this is overkill and adds failure points. For client-facing webinars, coaching, or recorded courses on a Mac, it can be worth it. Budget for heat management and test a full 90-minute call before you rely on it. Many people buy this setup, love the image for a week, then go back to a webcam because they are tired of charging batteries and flipping the camera to webcam mode.
Mac setup mistakes that ruin 4K quality
Light beats sensor. A $120 webcam with a window in front of you will beat a $300 4K webcam with a bright window behind you. Put your desk facing the window or add a simple LED key light at 10-20% brightness just behind your monitor. Overhead can lights alone create harsh shadows and force the camera to crank gain.
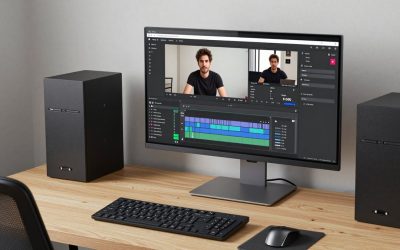
Set expectations in-app. In Zoom, enable HD and turn off “touch up my appearance” if you look waxy. In Teams, check that your hub is not forcing MJPEG at low fps. Record a 30-second test in QuickTime Player at full resolution to see what the camera can actually do, then compare to what Zoom shows you. If QuickTime looks great and Zoom looks soft, the limit is bandwidth, not your camera.
Finally, mount at eye level. Clamping a 4K camera to a 32-inch monitor and looking up at it wastes all that detail on nostrils and ceiling. A small riser or monitor arm so the lens is level with your eyes does more for perceived professionalism than jumping from 1080p to 4K.
FAQ
Do I need 4K for Zoom and Teams on Mac?
No, for most calls. Those apps usually show you at 720p to 1080p anyway. Buy 4K for sharper downscaled 1080p, better digital zoom, and better recordings, not because the other person will see 4K.
Why does my 4K webcam only show 1080p on my Mac?
Usually bandwidth or the app. Try a direct Mac port instead of a bus-powered adapter, quit other apps using the camera, and test in Photo Booth or QuickTime. If it is 4K there but not in Zoom, the meeting app is limiting it.
Is Continuity Camera better than a dedicated 4K webcam?
Often yes for image quality, especially in low light, if you already own a recent iPhone. A dedicated webcam is better for all-day reliability, no battery worries, and always-ready mounting.
What should I check for Mac compatibility?
That 4K, autofocus, and field-of-view settings work over USB without a Windows-only utility, that there is Apple Silicon support if an app is required, and that the camera stays at your chosen settings after sleep and reboot.
Related Reviews & Guides
Best lighting for home office video calls in 2026
Best Webcam for Computer Monitor