Last Updated: October 18, 2026
If you use a Mac for work, you do not need the most expensive webcam. You need one that shows up instantly in Zoom, Teams, Meet, and FaceTime, holds focus without hunting, and does not require Windows-only software to look decent. I have tested a lot of USB webcams on MacBook Air, MacBook Pro, and Mac mini setups, and the pattern is consistent: simple UVC plug-and-play models cause the fewest headaches.
Macs have good built-in cameras on paper, but they sit in the wrong place for a docked setup, and the image falls apart in a dim home office. A separate USB webcam on top of your monitor fixes framing, eye contact, and low-light noise in one move.
📄 In This Review
Why Macs are picky about USB webcams
macOS works best with webcams that follow the UVC standard. That means no driver install, just plug in and select it in your video app. Almost all mainstream 1080p webcams do this. Problems start with 4K models and models that depend on a companion app for autofocus tuning, background blur, noise removal, or firmware updates.
Common Mac-specific failure modes: the vendor app is Windows-only, so you cannot turn off aggressive beauty filters or auto-framing. The camera ships with a USB-A cable and misbehaves through a cheap USB-C hub. Or it defaults to 4K / 30fps and stutters because your dock or older Mac cannot sustain the bandwidth. If you want zero fuss, choose a camera that looks right with no app at all.
What to buy for work, not specs
See also: Best Monitor for MacBook Air: Two USB-C 4K Screens and Six Adapter-Dependent Alternatives • Best Monitor for MacBook Pro: Eight Listings Sorted by Cable, Sharpness and Scaling
Resolution is overrated for calls. A clean 1080p image with good exposure beats a soft, noisy 4K image. What matters is autofocus that locks and stays locked, auto-exposure that does not blow out your face when a window is behind you, and dual microphones that do not sound harsh. A physical privacy shutter is worth having if you leave the camera plugged in.
Field of view matters more than people expect. Around 78 to 90 degrees is ideal for a desk. Wider than 95 degrees makes you look small and shows your whole room. Fixed-focus is fine if you sit still at one distance. Autofocus is better if you lean in, hold up documents, or use a whiteboard behind you.
Check the mount and cable. The clip needs to grip a thin MacBook lid and a thick external monitor. A 1.5m or longer detachable USB cable saves a lot of trouble on a Mac mini or a laptop dock. USB-C direct or USB-A with a good adapter both work, but avoid chaining through an unpowered hub.
Quick comparison
| Category | Resolution | Focus | Mac setup | Best for |
|---|---|---|---|---|
| Workhorse 1080p autofocus | 1080p / 30 or 60fps | Autofocus | Plug-and-play, no app needed | Daily Zoom / Teams users |
| 4K upgrade | 4K / 30fps, 1080p / 60fps | Autofocus + auto-framing | Usually plug-and-play, app often Windows-only | Presenters, recording, cropping |
| Budget 1080p fixed-focus | 1080p / 30fps | Fixed focus | Plug-and-play | Second desk, kids, occasional calls |
| Compact travel model | 1080p / 30fps | Fixed or autofocus | Plug-and-play | MacBook-only workers |
Best overall: a mainstream 1080p autofocus webcam
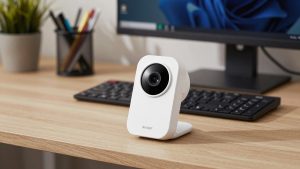
For most Mac home offices, this is the right buy. Look for a well-reviewed 1080p USB webcam for Mac with autofocus, dual stereo mics, a privacy shutter, and a 78- to 90-degree field of view. In normal daylight or a desk lamp, you will look sharp without tweaking settings.
Trade-offs are modest. 1080p at 30fps will not look like a mirrorless camera, and digital zoom will get soft fast. Some models over-sharpen faces or hunt for focus in low light if you sit in front of a busy bookshelf. Turning off auto low-light boost, adding one lamp in front of you, and sitting 2 to 3 feet away fixes most of it.
Who suits it: anyone doing 5 to 20 calls per week on Zoom, Teams, Google Meet, or Webex. If your Mac is managed by work IT and you cannot install drivers, this category is the safest choice. The cheaper option is genuinely fine here unless you record video.
Best upgrade: 4K webcam with a larger sensor
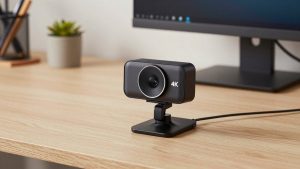
A 4K model makes sense if you present a lot, record tutorials, or want to crop in without losing sharpness. The better ones also handle mixed lighting more gracefully. Search for a 4K USB webcam for Mac and check reviews specifically from Mac users before you buy.
Be honest about the downsides. Many 4K webcams run warm, need more USB bandwidth, and only hit full quality in M-series Mac apps that actually request 4K. In Teams and Zoom, you will often be sent at 1080p or 720p anyway because of the meeting platform. Some auto-framing features that follow you around the room feel clever at first, then distracting in a 1:1. If the vendor locks key settings behind Windows software, you may be stuck with the default look on macOS.
Who suits it: creators, coaches, managers who run all-hands meetings, and anyone with strong lighting who will notice the difference. If your office is dark and your Wi-Fi is weak, fix lighting and connection first. A 4K sensor will not save a dim room.
Best budget: basic 1080p with privacy shutter
If you only join a few calls per week, buy a simple budget 1080p webcam with privacy shutter and spend the savings on light. Fixed-focus models are underrated for desk work: no focus hunting, no motor noise, and usually fewer surprises on a Mac.
The compromise is framing discipline. You need to sit in the sweet spot, usually 2 to 4 feet away, or you will look soft. Low-light performance is also weaker, with more grain and smeary motion if you move your hands. Microphones on cheap models tend to sound thin and pick up keyboard clatter. Use AirPods or a headset mic for important calls.
Who suits it: students, part-time remote workers, a second desk, or a family Mac. It is also a sensible backup to keep in a laptop bag if your main camera lives on your monitor.
Making it work reliably on macOS
Plug the camera directly into your Mac or a powered dock, then open Photo Booth or FaceTime to confirm video before opening Zoom or Teams. On macOS Ventura and later, check System Settings then Privacy and Security then Camera and Microphone if an app cannot see the device. Quit the other video app first. Only one app can claim the camera at a time.
If the image looks dark, do not buy a new camera yet. Face a window or put a cheap daylight LED panel behind your monitor, at face height. Keep bright windows out of the frame behind you. Set Zoom or Teams to 16:9 and turn off HD only if your fan spins up or video lags on hotel Wi-Fi. Clean the lens, update macOS, and avoid stacking two USB extensions together.
FAQ
Do I need to install software on a Mac?
Usually no. Choose a UVC plug-and-play model and macOS will recognize it. Vendor software is optional and often Windows-first. Only install it if you need firmware updates or want to change default framing.
Will a USB-A webcam work with a USB-C MacBook?
Yes, with a good USB-C to USB-A adapter or a powered dock. Use a short, direct connection for 4K models. Random disconnects almost always trace back to a cheap hub, not the camera.
Is 4K worth it for Zoom and Teams?
For most people, no. Meeting apps usually compress you to 1080p or lower. Buy 4K if you record locally, stream, or crop into the frame. Otherwise put the money toward lighting and a better mic.
Why does my webcam look worse than my MacBook camera?
It is usually exposure, distance, or app settings. Sit closer, add front light, select 1080p in the app, and turn off background effects while testing. If autofocus keeps pulsing, switch to fixed focus or move away from high-contrast backgrounds.