Last Updated: October 18, 2026
If you use a Mac for work, you have probably noticed the problem: macOS is smooth, Zoom and Teams run fine, but you still look soft, grainy, or washed out. Even the newer MacBook cameras top out at 1080p in a tiny sensor, and the Mac mini, Mac Studio, and most external displays have no camera at all.
An external camera fixes that, but Mac compatibility adds a few wrinkles. Many webcam features like background blur, auto-framing, and firmware updates are built around Windows apps. On a Mac, you want something that works plug-and-play over USB-C, is recognized by FaceTime, Zoom, Teams, and Meet, and does not require a Windows-only utility to unlock basic settings.
📄 In This Review
What actually matters on a Mac
Resolution is not the first thing to look at. Sensor size, lens quality, and autofocus behavior affect how you look far more than 1080p vs. 4K on paper. A good 1080p camera with a larger sensor will beat a cheap 4K camera in a dim home office every time.
Focus on these three things: USB connection, macOS control, and low-light handling. USB-C or a detachable USB-A cable with a USB-C adapter is ideal for modern MacBooks. For control, check that exposure, white balance, and focus can be adjusted from macOS, either in-camera with physical controls or via a real Mac app, not just a Chrome web page. For low light, look for a larger sensor, f/2.0 or wider aperture, and honest sample footage in a home office, not a studio demo.
Also consider microphones. Almost every external camera includes mics, but they pick up keyboard noise and room echo. They are fine for quick calls. If you are on calls all day, a separate USB mic or headset will make a bigger difference than jumping from a $100 to a $200 camera.
The three routes that make sense
See also: Best Monitor for MacBook Air: Two USB-C 4K Screens and Six Adapter-Dependent Alternatives • Best Monitor for MacBook Pro: Eight Listings Sorted by Cable, Sharpness and Scaling
For Mac users, there are really three practical routes: a simple business webcam, a higher-end 4K webcam with better optics, and using a mirrorless camera or iPhone as a webcam.
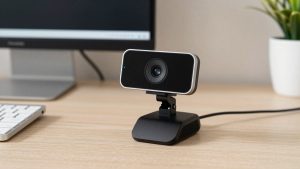
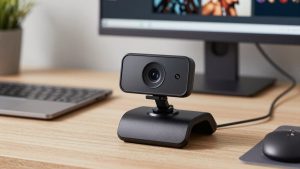
A simple 1080p business webcam is enough for most office work. You get reliable autofocus, a 78-90 degree field of view that does not distort your office, and dual mics with basic noise reduction. Trade-off: dynamic range is limited. If you sit in front of a bright window, your face will go dark while the window stays correctly exposed. Failure mode to watch for is fixed focus on ultra-cheap models – if you lean in to show a document, you go blurry and stay blurry.
A higher-end 4K webcam makes sense if you present, teach, record, or want to crop in. The larger sensor helps with low light and you can run it at 1080p for calls while keeping 4K for recording. Trade-off: they run hotter, need more USB bandwidth, and features like auto-framing and background blur often need the vendor’s software, which is sometimes Windows-first. On Mac, test that the camera remembers your settings after unplugging.
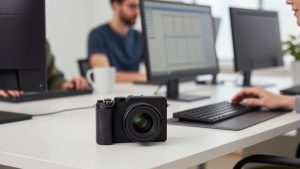
Using a mirrorless camera or iPhone via Continuity Camera gives you by far the best image. A real camera lens blurs the background naturally and handles mixed lighting well. Trade-off: complexity. You need constant power, a tripod or mount, good lighting to actually see the benefit, and a capture card or clean HDMI for many cameras. It can overheat on long calls, and autofocus can hunt if you move around. This is great for creators, overkill for daily standups.
| Option | Best for | Strength on Mac | Weakness to know |
|---|---|---|---|
| 1080p business webcam | Daily Zoom / Teams, home office | Plug-and-play, low CPU use, works with hub | Poor backlight handling, soft in low light |
| 4K prosumer webcam | Presenting, teaching, recording | Sharper image, better low light, crop flexibility | More heat, needs direct USB port, software may be limited on macOS |
| Mirrorless / iPhone as webcam | Streaming, YouTube, high-end setup | Best image and background blur | Needs mount, power, lighting; can overheat or disconnect |
| Built-in MacBook camera | Travel, backup | Always there, Center Stage on newer models | Small sensor, no placement control, none on desktop Macs |
Which to buy for your setup
For most MacBook users doing calls 2-5 hours a day, buy a well-reviewed 1080p webcam for Mac with autofocus and a privacy shutter. Look for USB-C compatibility in the specs, a 78-80 degree field of view, and a clip that actually fits a MacBook lid or Studio Display without wobbling. The cheaper option is genuinely fine here if your office has decent light. Spend the $30-40 you save on a small LED panel behind your monitor – that will improve your image more than a sensor upgrade.
For a desktop Mac like a mini or Studio, or if you record Loom videos and courses, step up to a 4K webcam for MacBook with a larger sensor and manual exposure control on macOS. Mount it on a separate tripod or monitor arm rather than on top of a 27-inch display – eye-level placement matters more than resolution. Plug it directly into the Mac, not through a cheap hub, if you see stuttering or disconnects at 4K. Run your calls at 1080p and save 4K for recording to avoid dropped frames in Teams and Meet.
For creators who already own a mirrorless camera, try that before buying a webcam. You will need a sturdy camera monitor mount for Mac desk setup, a dummy battery or USB-PD power, and either the manufacturer’s Mac webcam utility or a USB capture device. Test a full 90-minute call before you rely on it. Watch for overheating shutdowns, autofocus pulsing, and the camera going to sleep after 30 minutes. If any of those happen, a dedicated prosumer webcam is actually more reliable, even if the image is a step down.
Setup tips that matter more than specs
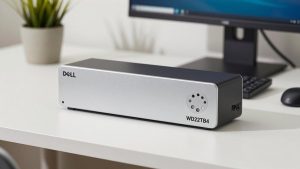
Macs are picky about USB hubs and adapters. If your new camera flickers, freezes at higher resolutions, or is not recognized after sleep, connect it directly to a Thunderbolt / USB-C port on the Mac with a quality cable. Cheap USB-A to USB-C adapters are a common failure point, especially for 4K.
Lighting and placement solve half of all complaints. Put your face toward a window or a soft white light, not with a bright window behind you. Set the camera at eye level, about arm’s length away. In Zoom and Teams on Mac, turn off auto-adjust low light and touch-up if you bought a good camera – those software fixes often add lag and make you look waxy.
Finally, check privacy and permissions. After plugging in, go to System Settings > Privacy and Security > Camera and Microphone and confirm your apps have access. If a vendor offers a Mac tuning app, install it from the official site, set exposure and white balance once, and check whether settings persist after reboot. If they do not, choose a camera that looks good with defaults.
FAQ
Do I need drivers for a webcam on Mac?
Usually no. Most webcams are UVC-compliant and work plug-and-play with FaceTime, Zoom, Teams, and Meet. You only need vendor software for advanced features like background blur, presets, or firmware updates, and that software is not always available for macOS.
Can I just use my iPhone as a Mac webcam?
Yes, Continuity Camera is surprisingly good and better than most cheap webcams in low light. It works best when the iPhone is mounted still, plugged into power, and on the same Apple ID. It is less ideal as a permanent desk setup because of battery wear, mounting hassle, and occasional disconnects.
Is 4K worth it for Zoom and Teams?
For live calls, usually not. Most platforms compress you to 720p or 1080p anyway. 4K helps if you record, stream, or want to crop in without losing sharpness, and better 4K models often have better lenses and low-light performance. If you only do meetings, put the money toward lighting.
Why does my external camera look dark on Mac?
It is almost always backlight or auto-exposure. Move bright windows out from behind you, add light in front of you, and lower exposure compensation if your Mac app allows it. If the image is dark only in one app, check that app’s video settings – Teams and Zoom apply their own auto-exposure on top of the camera’s.