Last Updated: September 18, 2026
Learning how to hide cables under a desk is less about making every wire disappear and more about creating a safe, flexible path for power and data. A rushed setup can leave cords dragging on the floor, pulling against plugs, collecting dust, or catching on your feet and chair. Too much tension may damage a cable or loosen a connection, while tightly bundled power cords can become difficult to inspect and troubleshoot.
The best approach is to separate cables by purpose, mount a cable tray beneath the desktop, and leave enough slack for cleaning and height adjustment. The steps below work for a fixed desk or a standing desk and can usually be completed in about 30 to 60 minutes.
As an Amazon Associate we earn from qualifying purchases at no extra cost to you.


Quick answer: Our top pick in 2026 is the Under-desk cable tray — our #1 rated choice. See the full ranked comparison, alternatives and buying advice below.
What You Need
| Item | Why | Optional? |
|---|---|---|
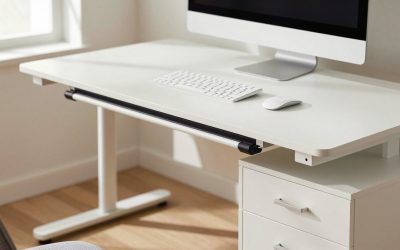
| Under-desk cable tray | Supports power strips, adapters, and excess cord length so they do not hang below the desk | No |
| Velcro cable ties | Keep bundles tidy without permanently squeezing or damaging wires | No |
| Cable clips or adhesive mounts | Guide individual cords along the underside or rear edge of the desktop | No |
| Measuring tape | Checks tray clearance, cord lengths, and standing-desk travel | No |
| Marker and removable painter’s tape | Marks positions before installing hardware or adhesive | Yes |
| Phillips screwdriver or drill | Installs screw-mounted trays and clips when needed | Yes, for no-drill trays |
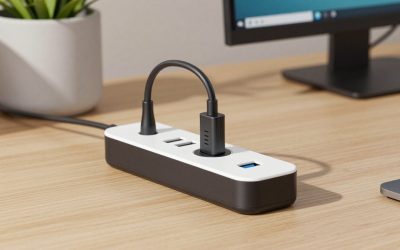
| Power strip with surge protection | Consolidates plugs at the desk and reduces loose adapters on the floor | Yes |
For a no-screw option, the Scanfield Under Desk Cable Management Tray, No-Screw, 17-Inch, 2-Pack Black costs about $31.95. A clamp-mounted alternative is the Under Desk Cable Management Tray No Drill, Metal Mesh Cable Management Under Desk with Clamp Mount, listed at about $13.99. Before buying, measure the space between your desk legs, check the tray’s mounting method, and confirm that the tray can support your power strip and adapters. A tray that is 17 inches long may fit neatly under a compact desk but may not span a large workstation.
Step-by-Step
See also: Best Gaming Desk Pads for Full Desk Coverage • Best Desk Organizers Under $30: Match the Organizer to Your Clutter
1. Unplug and photograph the current setup (5 minutes)
Turn off your computer and connected equipment, then unplug devices one at a time. Take a quick photo before removing everything. This gives you a reference for which charger belongs to which device and helps you reconnect equipment correctly.
Do not pull plugs by the cord. Grip the plug itself, especially if the cable is already kinked, warm, cracked, or loose at the connector. Set aside any visibly damaged cable for replacement rather than hiding it under the desk.
2. Sort cables by destination (5 to 10 minutes)
Make three groups: power cables, data and display cables, and occasional-use cables. Power cables include the computer, monitor, speakers, lamp, and chargers. Data cables include USB, Ethernet, audio, and display connections. Occasional-use cables might serve a camera, game controller, external drive, or headphones.
Keep power and signal cables in separate bundles when practical. They do not need to be perfectly isolated, but avoiding one extremely tight bundle makes troubleshooting easier and reduces visual clutter. Label both ends of unfamiliar cables with small pieces of removable tape.
3. Choose the tray location (5 minutes)
Hold the tray under the desktop and test several positions. The rear half of the desk is usually best because it keeps cords away from your knees. Leave at least 2 inches of clearance from the edge of the desktop if the mounting hardware needs room, and check that the tray will not hit a drawer, crossbar, or desk frame.
For a standing desk, raise and lower the frame while holding the cables loosely in place. The cables should reach their destinations at the desk’s highest position without becoming taut. Also check the lowest position so a loop does not drag on the floor.
4. Measure slack before securing anything (5 minutes)
Allow a gentle service loop near each device and connection point. A loop of roughly 4 to 8 inches is usually enough for routine adjustments, though a standing desk may require more depending on its height range and the location of the wall outlet.
Do not coil excess cable into a tight circle. Use broad, loose loops and avoid sharp bends, particularly near power adapters, USB connectors, and monitor ports. If the cable is much longer than necessary, replace it with a shorter cable instead of creating a large bundle.
5. Install the tray (5 to 15 minutes)
For a no-drill tray, follow the included mounting instructions and place the clamps or supports over a sturdy section of the desktop frame. Tighten them evenly and test the tray with one lightweight item before loading it fully. For a screw-mounted tray, mark the holes with painter’s tape, confirm that the screws will not pass through the desktop, and install the tray without overtightening.
Do not exceed the manufacturer’s weight rating. If no rating is provided, be conservative: start with the power strip and smaller adapters, then check whether the tray flexes, sags, or shifts. A heavy brick-style adapter may need separate support rather than being stacked on top of other equipment.
6. Mount the power strip and adapters (5 minutes)
Place the power strip inside the tray or secure it where its switch remains reachable. Keep its ventilation openings clear, and do not cover it with fabric, paper, or a dense pile of cables. Arrange large adapters so they do not press against one another or block the outlets.
Plug the power strip directly into a wall outlet whenever possible. Avoid connecting multiple power strips together. As a general guideline, add up the wattage of high-draw devices and stay below the power strip’s stated rating; a monitor, computer, and lamp usually draw far less than a 1,500-watt household circuit limit, but the product labels are the authority.
7. Route and secure each cable (10 to 15 minutes)
Run cables from the tray to their destinations using the shortest practical path. Use one Velcro tie every 8 to 12 inches on a longer bundle, fastening only until the cables are held together. You should be able to slide a finger under each tie.
Use adhesive clips along the rear underside of the desktop for individual monitor, keyboard, mouse, and charging cables. Clean the mounting surface first and allow adhesive time to set according to the product directions. Keep cords away from moving desk legs, chair casters, drawer slides, and sharp metal edges.
8. Reconnect and test the desk (5 minutes)
Reconnect devices one at a time, using your photograph and labels. Confirm that each monitor, peripheral, charger, and network connection works before tightening the final ties.
Move the chair around the desk, raise and lower a standing desk through its full range, and gently tug each cord near its device. Nothing should pull on a port, hang lower than the desk, or sit where a foot can catch it. Leave the power strip switch and wall plug accessible.
Mistakes to Avoid
- Bundling everything too tightly: Tight ties crush insulation and make future repairs frustrating. Use reusable Velcro ties and leave room to add or remove a cable.
- Hiding a damaged cord: Frayed insulation, exposed conductors, scorch marks, or a hot plug are reasons to unplug and replace the cable.
- Blocking ventilation: Do not bury power bricks or power strips under blankets, paper, or dense cable piles.
- Ignoring moving parts: Desk legs, keyboard trays, and chair mechanisms can shear cables that appear safely routed.
- Relying only on adhesive: Dusty or textured surfaces can cause mounts to fall. Use a clamp or screw-mounted tray for heavier equipment.
- Making the tray inaccessible: Leave enough room to reach the power strip, identify a plug, and clean underneath the desk.
How Often
Inspect the setup every three to six months, and sooner if you move the desk frequently. Check for loose clamps, sagging trays, peeling adhesive, bent plugs, and cables rubbing against metal. Dust the tray and power strip with the equipment unplugged, using a dry microfiber cloth or compressed air as appropriate.
Recheck a standing-desk installation whenever you change the monitor arm, add a device, or alter the desk’s height range. A cable route that worked at installation may become too short after adding a docking station or rearranging the room.
When to Call a Pro or Replace
Replace any power cord with exposed wiring, melted insulation, repeated sparking, a burnt smell, or a plug that becomes unusually hot. Stop using a power strip if its housing is cracked, outlets are loose, or the reset button will not function normally.
Call a qualified electrician if you need a new wall outlet, a dedicated circuit, concealed in-wall wiring, or help with repeated breaker trips. A home-office cable tray can organize cords, but it should not be used to conceal unsafe electrical connections or overloaded equipment.
FAQ
What is the easiest way to hide cables under a desk?
Install a cable tray beneath the rear of the desktop, place the power strip inside it, and route individual cords with Velcro ties and cable clips. A clamp-mounted or no-screw tray is often the simplest choice for renters or finished furniture.
Should cables go in front of or behind the desk legs?
Route them behind the legs whenever possible, while leaving enough slack for the desk to move. Never place a cable where a leg, caster, drawer, or height-adjustment mechanism can pinch it.
Can I put a power strip in an under-desk cable tray?
Usually, yes, if the tray is designed to support it and the power strip remains ventilated and accessible. Check the tray’s weight capacity and the power strip’s instructions. Do not connect power strips together or cover the strip with other materials.
How do I hide cables on a standing desk?
Measure the distance between the desk’s lowest and highest positions, then leave a loose vertical loop near the moving frame. Secure the loop so it cannot reach the floor or rub against the legs, and test the full travel range before adding permanent ties.
Ready to decide? Our #1 pick for 2026 is the Under-desk cable tray.
Live price & availability on Amazon.
Related Reviews & Guides





6 Best Desk Chairs With Footrest 2026

6 Best Cable Management Boxes for Floor & Desk