Last Updated: September 4, 2026
- Quick Comparison
- Top Picks at a Glance
- Step 1 — Audit Your Cables Before Buying Anything
- Step 2 — The Four-Layer Cable Management System
- Step 3 — Cable Management for Standing Desks
- Step 4 — Cable Management for Corner Desks and L-Shapes
- Cable Management Tools: What to Buy
- The Biggest Cable Management Mistakes
- FAQ
- Frequently Asked Questions
- About the Author
- Related Articles
Wire Management Cable Desk Guide 2026: How to Hide Every Cable Under Your Home Office Desk
Quick Answer / TL;DR
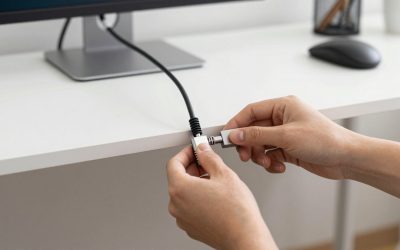
Effective wire management cable desk setups use four things: a cable tray under the desk (holds power strips and loose cable runs), cable raceways along desk legs (routes cables to floor), cable clips on the desk edge (anchors individual cables), and velcro ties (bundles cables at the source). Total materials cost: $20–$40. Time: 45–90 minutes. Result: a clean desk with zero visible cable spaghetti.
Cable chaos on a home office desk isn’t just ugly — it’s a genuine productivity problem. Studies on visual clutter show that disordered environments increase cognitive load and reduce focus. Every tangle of cables in your peripheral vision is a micro-drain on attention.
As an Amazon Associate we earn from qualifying purchases at no extra cost to you.


This tutorial covers the complete process: tools and materials, step-by-step installation, solutions for different desk types (standing desks, corner desks, wall-mounted setups), and how to maintain a clean cable setup as your gear changes. Practical guidance only — no $200 “cable management systems” required.
🛒 Best Price Today on Amazon
Prime members get fast, free shipping on everything above, plus member-only deals. New members get a 30-day free trial — cancel anytime.
Start 30-Day Prime Free Trial →See Today’s Amazon Deals📄 In This Review
- Quick Comparison
- Top Picks at a Glance
- Step 1 — Audit Your Cables Before Buying Anything
- Step 2 — The Four-Layer Cable Management System
- Step 3 — Cable Management for Standing Desks
- Step 4 — Cable Management for Corner Desks and L-Shapes
- Cable Management Tools: What to Buy
- The Biggest Cable Management Mistakes
- FAQ
- Frequently Asked Questions
- About the Author
- Related Articles
Quick Comparison
| Product | Brand | Price | Rating |
|---|---|---|---|
| SOULWIT 50Pcs Self Adhesive Cable Management Clips | SOULWIT | $13.95 | 4.6/5 |
| Cord Management Organizer Kit 4 Cable Sleeve split with… | N NOROCME | $15.65 | 4.6/5 |
| YECAYE 6 Pack Cable Management | Yecaye | $16.14 | 4.6/5 |
| YECAYE 94.2 in Cable Management Under Desk | Yecaye | $19.99 | 4.6/5 |
| XHF 120 PCS Adhesive Cable Wire Clips Black | XHF | — | 4.5/5 |
Top Picks at a Glance
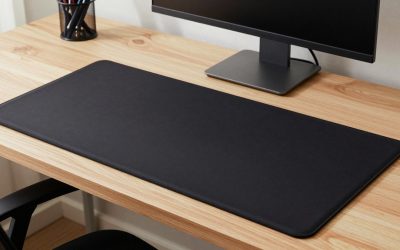
See also: Best Ways to Organize Cables Behind a Desk • Best Gaming Desk Pads for Full Desk Coverage
BEST DESK UPGRADE
TIQLAB Standing Desk — built-in cable management channel, motorized, $119.99
$119.99
BEST MONITOR ARM
monTEK Dual Monitor Arm — internal cable routing channels, eliminates monitor cables from desk surface
$104.99
BEST KEYBOARD
Keychron Q8 — wireless option eliminates desk cable runs from keyboard entirely
$79.99
Step 1 — Audit Your Cables Before Buying Anything
Pull your desk away from the wall. Lay out every cable on the floor. Identify each one. Typical home office desk cable inventory:
- Monitor power cable(s) — 1 per monitor
- Monitor display cable — DisplayPort or HDMI, 1 per monitor
- Computer power cable or laptop charger
- USB hub or dock power + data cables
- Keyboard cable (or eliminate it with a wireless model — see our learn about keychron q8 mechanical keyboard review)
- Mouse cable (or eliminate it — the see protoarc ergonomic mouse review is wireless)
- Speaker cables, microphone cable, lighting cables
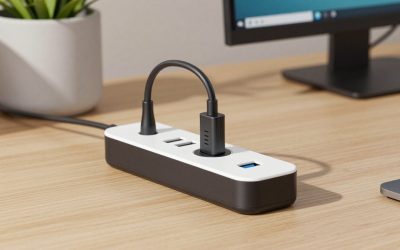
- Power strip or surge protector cable to wall outlet
Count them. Most home office desks have 8–14 cables. The goal is to route all of them off the desk surface and keep them invisible from a seated position.
Step 2 — The Four-Layer Cable Management System
Layer 1: Wireless Peripherals (Eliminate Cables at Source)
The most effective cable management is eliminating cables entirely. A wireless keyboard and mouse remove 2–4 cables from your desk permanently. Bluetooth peripherals are as responsive as wired for office tasks — there’s no meaningful latency for typing or cursor movement. Start here before buying any cable management hardware.
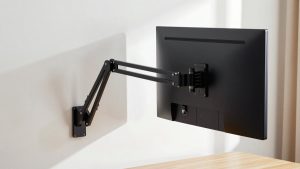
Layer 2: Monitor Arm with Internal Routing (Eliminate Monitor Cables from Surface)
A monitor arm like the see montek dual monitor arm review routes display and power cables through internal channels in the arm itself. Your monitor cables run from the back of the monitor, through the arm, and emerge at the desk clamp — completely hidden. This alone removes the most visually prominent cables from your desk surface.
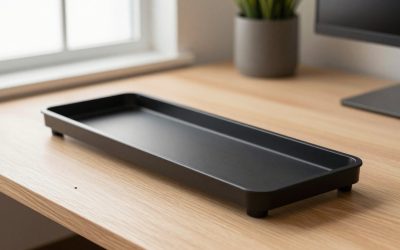
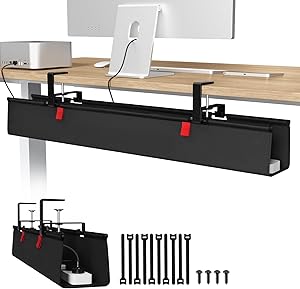
Layer 3: Under-Desk Cable Tray (Organize Power Strip and Cable Runs)
A cable tray mounts to the underside of your desk — typically via screws or clamps — and holds your power strip plus all loose cable runs off the floor. This is the single most impactful hardware purchase for cable management. Models from J Channel, Sanus, and Cable Box range from $12–$25 and take 15 minutes to install.
Installation steps for an under-desk cable tray:
- Measure the underside of your desk — tray should span at least 60% of the desk depth
- Mark mounting holes 3–4″ from the desk’s back edge
- Pre-drill pilot holes if using wood screws (skip for clamp-style trays)
- Mount tray, place power strip in tray
- Bundle power cables with velcro ties before dropping into tray
- Route cable runs horizontally in tray toward the exit point (desk leg or wall)
Layer 4: Cable Raceway or Desk Grommet (Route Cables to Floor)
Once cables exit the under-desk tray, they need to reach the floor and wall outlet without dangling visibly. Two approaches:
- Adhesive cable raceway: Plastic channel that mounts to the desk leg or wall. Cables run inside the channel. $8–$15. Best for renters or anyone who can’t drill.
- Desk grommet: A hole drilled through the desk surface with a plastic cap. Cables drop straight down through the desk to the under-desk tray. Cleaner look, permanent. $5–$10 for the grommet hardware.
Step 3 — Cable Management for Standing Desks
Standing desks introduce a unique challenge: as the desk height changes, cable slack requirements change. Cables that are taut at sitting height will tension and potentially disconnect at standing height — and vice versa.
The solution is a cable chain or cable sleeve — a flexible conduit that bundles all cables running from the desk surface to the floor, with enough slack to accommodate the full height range of the desk. For a desk with a 28–46″ height range (like the learn about best standing desks), you need approximately 18″ of extra cable slack built into the loop at the bottom.
Standing Desk Cable Management Checklist
- Mount power strip in under-desk tray — it moves with the desk
- Use a cable chain sleeve from desk underside to floor
- Leave 16–20″ of extra cable slack looped in the under-desk tray
- Test at both minimum and maximum desk height before finalizing routes
- Use velcro ties (not zip ties) so you can re-route as gear changes
Step 4 — Cable Management for Corner Desks and L-Shapes
Corner desks have the longest cable runs — cables often need to traverse 5–8 feet to reach the wall outlet. The approach:
- Place power strip at the desk’s corner (closest point to the room’s outlet)
- Run monitor and peripheral cables along the desk’s back edge, anchored with adhesive cable clips every 12″
- Bundle all cables at the corner into a sleeve before dropping to floor
- Use a floor cable cover (flat plastic channel) if cables must cross a walkway
Cable Management Tools: What to Buy
| Tool | Purpose | Cost | Priority |
|---|---|---|---|
| Velcro cable ties (pack of 20) | Bundle cables at source | $6–$8 | Essential |
| Adhesive cable clips | Route individual cables along desk edge | $8–$12 | Essential |
| Under-desk cable tray | Hold power strip + cable runs | $12–$22 | Essential |
| Cable sleeve/wrap | Bundle cables from desk to floor | $8–$15 | High |
| Adhesive cable raceway | Route cables along wall or desk leg | $10–$18 | Medium |
| Cable labels (pack) | Identify cables at a glance | $5–$8 | Low |
Total budget for a thorough cable management setup: $35–$55. The velcro ties and under-desk tray alone handle 80% of the problem.
The Biggest Cable Management Mistakes
- Using zip ties instead of velcro: Zip ties are permanent. When you add or swap a cable, you cut the tie and replace it. Velcro opens and re-closes in seconds. Always use velcro for cable bundles.
- Routing too tightly on a standing desk: Cables taut at seated height will disconnect or fray at standing height. Always leave extra slack.
- Not labeling cables: After you’ve bundled everything and hidden it under the desk, you will forget which cable is which. Label before you hide them.
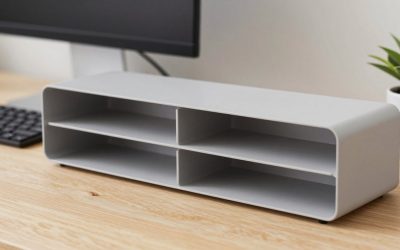
- Buying a “cable management box” that just hides the problem: Cable boxes sit on your desk and contain the tangle — they don’t solve it. Under-desk trays actually clear the desk surface.
FAQ
What is the best way to manage cables under a desk?
Mount a cable tray to the underside of your desk, place your power strip in it, and route all cable runs horizontally in the tray before dropping to the floor via a cable sleeve. Pair with a monitor arm that has internal cable routing (like the our montek dual monitor arm review) to eliminate surface cables entirely.
How do I manage cables on a standing desk?
Use a cable chain or flexible sleeve from the desk underside to the floor, with 16–20″ of extra slack coiled in the under-desk tray. This slack accommodates the full height range of the desk without tension on cables at maximum standing height.
Can I do cable management without drilling?
Yes. Adhesive cable trays (3M adhesive mounts), adhesive cable clips, and clamp-style cable trays all install without drilling. Adhesive solutions are reliable on solid wood and MDF desk surfaces. Avoid adhesive mounts on glass or glossy surfaces — they don’t hold long-term.
How do I reduce the number of cables on my desk?
Wireless keyboard and mouse eliminate 2–4 cables. A USB-C hub or dock consolidates all peripheral connections into one cable to your laptop. A monitor arm routes display cables internally. These three changes can reduce a 12-cable desk to 4–5 cables before you add any management hardware.
What’s the difference between a cable tray and a cable raceway?
A cable tray mounts horizontally under the desk and holds loose cables and power strips. A cable raceway is a channel that mounts vertically on a wall or desk leg to route cables from one point to another. You typically use both: tray holds the bulk, raceway routes cables to the wall outlet. Together they cost $25–$35 and solve 90% of cable chaos.
Frequently Asked Questions
What is the easiest way to manage cables under a desk?
Start by grouping cables with reusable hook-and-loop ties, then route them along the desk’s rear edge using adhesive clips or a cable tray. A under-desk tray hides power strips and excess slack out of sight. Labeling each cable end makes future swaps painless.
Do I need an under-desk cable tray or just clips?
Clips and ties handle a light setup with a few cables, while a tray is worth it once you have a power strip, charger, and multiple devices to corral. A tray keeps everything off the floor for easier cleaning and a tidier look. Many people combine a tray for the bulk with clips for individual runs.
How do cable trays attach without drilling?
Most modern under-desk trays mount with strong adhesive pads or clamp onto the desk frame, so no drilling is needed. Screw-mount trays are sturdier for heavy loads if you do not mind making holes. Check that the adhesive is rated for your tray’s weight before loading it up.
Will cable management reduce dust and overheating?
Lifting cables and power strips off the floor with a tray makes vacuuming easier and keeps dust from collecting around connectors. Tidy, spaced cabling also allows better airflow around adapters that can run warm. The result is a cleaner, slightly cooler setup that is easier to maintain.
Related Reviews & Guides



Adjustable Standing Desk: Top Picks Compared in 2026

6 Best Under Desk Walking Treadmill 2026