Last Updated: September 18, 2026
If you spend more than a couple of hours a day at a desk, the difference between a well-positioned lamp and a badly positioned one is easy to feel. Get it wrong and you’ll deal with glare bouncing off your monitor, a harsh shadow falling across your notebook every time you write, or a sore neck from unconsciously leaning toward light that’s in the wrong spot. Get it right and you get even, comfortable illumination with less eye strain at the end of the day.
The good news: positioning a desk lamp correctly takes about ten minutes, requires nothing more than a tape measure, and follows a few simple rules of thumb. This guide walks you through the whole process, whether you’re setting up a clamp-on LED lamp, a traditional desk lamp with a shade, or a touchscreen model with multiple color modes.
As an Amazon Associate we earn from qualifying purchases at no extra cost to you.


What You Need
| Item | Why | Optional? |
|---|---|---|
| Desk lamp (LED recommended, 5–10 watts) | Your light source. LED lamps stay cool and use a fraction of the wattage of old incandescent bulbs. | No |
| Tape measure or ruler | To check lamp height (roughly 12–20 inches above the desk surface) and clearance. | No |
| Clamp or sturdy base | Clamp-on models like the Airlonv LED Desk Lamp with Clamp (about $20, with a 17-inch arm) free up desk space; base models need about a 6-inch clear footprint. | No |
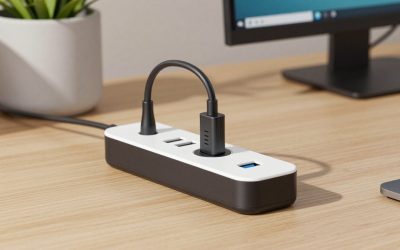
| Available outlet or USB port | Many modern lamps, such as touch-control models with built-in USB ports (often $15–25), power up from your monitor or a charger. | No |
| Dimmer or adjustable color mode | Lets you lower brightness for evening work and shift to warmer tones to reduce glare. | Yes, but strongly recommended |
| A friend or phone camera | To check for glare and shadows from your actual seated position. | Yes |
Step-by-Step
See also: Best Gaming Desk Pads for Full Desk Coverage • Best Desk Organizers Under $30: Match the Organizer to Your Clutter
1. Clear and map your desk (5 minutes)
Empty the area where the lamp will live. Note where your monitor, keyboard, and primary work zone sit. Your lamp needs to light the work zone — the area where you actually read, write, or sketch — not the back of the desk or the wall.
2. Choose the side opposite your writing hand (2 minutes)
If you write with your right hand, place the lamp on your left; if you’re left-handed, place it on your right. This stops your hand from casting a shadow across the page. If you only use a keyboard and rarely write by hand, either side works — pick whichever keeps the lamp out of your line of sight to the monitor.
3. Mount or place the lamp (5 minutes)
For a clamp-on lamp, attach the clamp to the desk edge (most fit edges up to about 2 inches thick) and tighten it snugly by hand. For a base lamp, set it at least 6 inches from the desk edge so it can’t be knocked off. Route the cord along the back edge and secure it with a clip if you have one.
4. Set the height (3 minutes)
Aim for the light source 12 to 20 inches above your desk surface, with the bottom of the head roughly at or slightly below your eye level when seated. Too high and light spills into your eyes; too low and you get a hot, concentrated pool with dark edges. A long arm — the 17-inch reach on a typical clamp lamp is a good example — makes hitting this range easy without eating desk space.
5. Angle the head away from your eyes (3 minutes)
Tilt the head so the light falls on your work zone, not toward your face or screen. A 30- to 45-degree angle from vertical is a reliable starting point. Sit in your chair and check: you should not see the bare LED diodes or the bright inner surface of the head from your normal seating position.
6. Test for glare and shadows (5 minutes)
Turn the lamp on at your usual brightness. Look at your monitor: if you see a reflection or haze, move the lamp sideways or lower it. Place your hand on your notebook: if your hand throws a hard shadow, shift the lamp further from your writing side or raise it slightly. Take a photo of your setup from your chair’s position — the camera often reveals glare you’ve adapted to.
7. Dial in brightness and color mode (2 minutes)
Set brightness to roughly match the ambient room light. A stepless dimming lamp lets you fine-tune this precisely; a 5-mode touch lamp gives you presets — use the cooler, brighter settings for detailed daytime tasks and warmer, dimmer settings for evening. Your lamp should complement overhead light, not fight it.
8. Lock it in and cable-manage (3 minutes)
Once the position works, tighten all arm joints, tuck the cord along the desk’s rear edge, and confirm the lamp doesn’t wobble when you bump the desk. Mark the clamp position with a small piece of tape if you share the desk with others.
Mistakes to Avoid
- Placing the lamp behind your monitor. It lights nothing you’re working on and creates a bright halo that makes your screen harder to read.
- Putting it on your writing-hand side. This guarantees a shadow across every page you fill in.
- Aiming the light at your screen or eyes. Direct glare causes squinting, headaches, and fatigue within an hour.
- Mounting it too high. Above about 20 inches, the light becomes ambient rather than task-focused, and spill hits your eyes.
- Using max brightness all the time. Full output in a dim room creates harsh contrast between the lit page and dark surroundings — a known contributor to eye strain. Match the room instead.
- Ignoring the clamp limit. Most clamps fit edges up to roughly 2 inches thick. Forcing one onto a thick or rounded desk edge risks a fall and damaged hardware.
- Skipping the seated-position check. A lamp can look perfectly placed from across the room and be badly glary from the chair.
How Often
Recheck your lamp position whenever you rearrange your desk, swap monitors, or change chairs — each of these shifts your eye level and work zone. As a habit, give the setup a quick two-minute glance test once a season: sit down, check for glare, and confirm joints haven’t loosened. Clean LED panels and lenses with a dry microfiber cloth every month or two; dust can cut output noticeably. If you use a dimmer daily, verify the full brightness range still works smoothly every few months.
When to Call a Pro or Replace
Desk lamps rarely need a professional, but call an electrician if you notice a warm or burning smell, flickering that persists after checking the connection, or discoloration around the plug or outlet — those are wiring issues, not positioning issues. Replace the lamp rather than repair it when: the arm no longer holds its position no matter how much you tighten it; the LED panel dims unevenly or shifts color (LEDs degrade over years of use); the touch controls respond erratically; or the clamp or base is cracked. Given that capable LED lamps now sell for roughly $15–25 — touch-control models with USB ports near $17 and clamp models with stepless dimming around $20 — replacement usually beats repair.
FAQ
Should a desk lamp be on the left or right?
Opposite your writing hand: left side if you’re right-handed, right side if you’re left-handed. That keeps your hand from casting a shadow as you write. If you never write by hand, place it on whichever side keeps glare off your monitor.
How high should a desk lamp be above the desk?
Typically 12 to 20 inches above the desk surface, with the light head at or just below seated eye level. Adjust from there based on your height and whether you notice glare or dark edges.
How many lumens or watts do I need for a desk lamp?
For task work, aim for roughly 450–800 lumens at the desk surface. Modern LED lamps deliver this using only 5–10 watts, which is why they run cool and cost pennies to operate.
Is a clamp-on lamp better than a base lamp?
For small desks, yes — a clamp lamp takes zero desk surface and its long arm reaches over your work zone. Base lamps are simpler to move and don’t require a suitable desk edge, but they occupy roughly a 6-inch footprint and their reach is shorter. Prices are comparable, generally $15–25 for a solid LED model in either style.
Related Reviews & Guides


What Size Desk Mat do I Need? Size Guide With Measurements (2026)

Cable Management Sleeve Cord Wrap Review