Last Updated: October 18, 2026
📄 In This Review
The short answer: don’t buy a work webcam for this
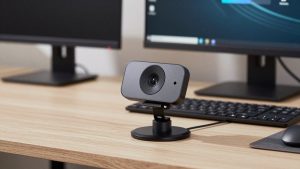
If you landed here with a home-office webcam in mind, save your money. A typical webcam made for Zoom and Teams is one of the worst tools you can use for astrophotography. Small sensor, heavy compression, aggressive noise reduction, autofocus that hunts in the dark, and exposure times capped at 1/30th of a second. Stars need seconds, not fractions of a second.
That does not mean you cannot experiment. The Moon and bright planets are realistic targets with the right setup. For anything dimmer – nebulae, galaxies, even most star clusters – you need a different category of camera entirely. This guide explains what actually works, where a cheap webcam is fine, and when to step up.
Why office webcams struggle at night
See also: Best Monitor for MacBook Air: Two USB-C 4K Screens and Six Adapter-Dependent Alternatives • Best Monitor for MacBook Pro: Eight Listings Sorted by Cable, Sharpness and Scaling
Astrophotography is the opposite of video calls. Video calls want bright, smooth, compressed 30fps video. Astro wants long, still, uncompressed frames with manual control over everything.
Most work webcams fail in four predictable ways. First, auto exposure cannot be turned off fully. Even in “manual” apps, gain will pump up and down as a bright planet drifts across the frame. Second, autofocus hunts forever on a point of light against black sky. Third, the built-in IR-cut filter blocks a lot of deep-red light, which is exactly where many nebulae emit. Fourth, compression smears faint detail. What looks fine on your face becomes blocky mush on Jupiter’s cloud bands.
There is also heat noise. Leave a tiny webcam sensor running for 20 minutes pointed at the sky and hot pixels bloom everywhere. It was never designed to run wide-open in the cold.
What you can realistically photograph with a webcam
Set expectations correctly and you will have more fun. With a telescope and a webcam that allows manual exposure, you can get sharp Moon craters, lunar mosaics, Saturn’s rings, Jupiter and its four Galilean moons, and Mars as a small orange disk during opposition. The International Space Station transiting the Moon is also possible with video capture.
What you cannot do well: Milky Way landscapes, Andromeda, Orion Nebula in color, or any long-exposure deep-sky work. Those need 10- to 120-second exposures, cooled sensors, and RAW files. A work webcam physically cannot hold the shutter open that long, and even if it could, amp glow and noise would bury the target.
If deep sky is your goal, skip webcams altogether and look at a dedicated planetary astronomy camera or a used DSLR you can mount directly to a tracker.
Your options, compared honestly
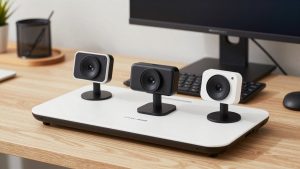
Think in categories, not megapixels. For astro, sensor control matters more than resolution. A 2MP sensor with manual shutter and RAW video will beat an 8MP office webcam every time.
| Option | Best for | Manual exposure? | Biggest limitation |
|---|---|---|---|
| Standard office webcam | Testing on the Moon only | Usually no, or fake manual | Auto focus/exposure, compression, 1/30s cap |
| Older manual webcam with direct-show control | Moon and planets on a budget | Yes, up to ~1-2 sec with hacked drivers | Tiny sensor, noisy, needs eyepiece adapter |
| Dedicated planetary camera | Planets, Moon, solar with filter | Yes, full shutter/gain/ROI control | Needs laptop, telescope tracking helps a lot |
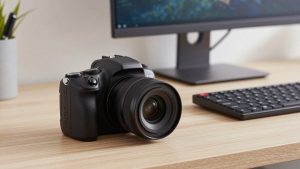
| Used DSLR / mirrorless | Moon, wide-field Milky Way, deep-sky starter | Yes, bulb mode + RAW | Heavier, needs T-ring, tracker for long exposures |
For most beginners who already own a telescope, the cheapest sensible path is No. 2: a used or cheap webcam with manual exposure control that lets you lock focus, lock white balance, and drop to 5-10fps for dimmer planets. If you already own one for work, try it before buying anything.
Who should skip straight to No. 3 or 4? Anyone who wants Saturn’s Cassini Division crisply, anyone doing color nebulae, and Mac-only users. Many hacked webcam drivers and stacking apps are Windows-only. On a Mac you will fight compatibility constantly.
How to make a webcam work on a telescope
You cannot just hold a webcam up to the eyepiece. You need prime-focus or eyepiece-projection with a proper 1.25-inch nosepiece. A cheap telescope eyepiece adapter that replaces the webcam lens with a threaded barrel is essential. Without it, you get vignetting, reflections, and shake.
Remove the webcam lens if your project allows it, set focus to manual at infinity, turn off auto white balance, right-light, and noise reduction. Capture short video, not stills: 60-90 seconds for planets at 10-30fps, then stack the best 20 percent in AutoStakkert or Registax. This technique, called lucky imaging, freezes atmospheric wobble.
Common failure modes to expect: USB dropouts in cold weather from a long, thin cable; dew fogging the nosepiece after 40 minutes; the planet drifting out of the tiny field in 20 seconds if your mount is not tracking; and laptop screens ruining your night vision. Bring a red film for the screen, a short active USB cable, and practice focusing on the Moon first in daylight.
Do not remove the IR-cut filter unless you know what you are doing. It helps for nebulae but ruins normal color and voids any warranty. For Moon and planets, leave it in.
What to buy – and when cheaper is fine
If you just want to show your kids Moon craters live on a laptop, the cheaper option is fine. Use what you have, lock exposure, and project it to the TV. Image quality will be soft, but the live wow factor is real.
Buy a dedicated planetary camera only if you have a tracking mount and you enjoy processing video. The difference is not subtle: uncompressed RAW video, region-of-interest cropping for 100+ fps, and shutter control down to milliseconds. That is what lets you freeze Jupiter’s rotation before it smears.
Buy a used DSLR instead if you want landscapes with the Milky Way or want to dabble in deep sky without a laptop in the field. A crop-sensor DSLR with an intervalometer and a $150 star tracker will run circles around any webcam for wide-field work. It is also far simpler on Mac, since you just import RAW files.
Do not buy a 4K conference webcam thinking more pixels will help astro. The pixels are smaller, noisier, and the firmware is even more aggressive. For night sky, control beats resolution.
FAQ
Can I use my normal Zoom webcam for astrophotography?
You can try it on the Moon, but expect frustration. You cannot lock exposure long enough for anything dim, and autofocus will hunt. If your software cannot disable auto exposure, auto focus, and auto white balance independently, it is not worth adapting.
What is the easiest first target?
The waxing half-Moon. It is bright, easy to find, easy to focus on, and forgiving of tracking errors. Jupiter is second, but you will need manual gain and at least 1/30 to 1/15 sec exposure to show cloud bands without blowing out.
Do I need a telescope, or can I just point a webcam at the sky?
You need optics. A webcam lens is 3-4mm wide-field. Stars will be invisible dots and planets will be single pixels. Even a small 80mm refractor or 6-inch Dobsonian with tracking changes everything.
Will this setup work on MacBook?
Sometimes for live view, rarely for serious stacking. Most capture and stacking tools for webcam astro are Windows-first. Many Mac users capture with a cheap Windows mini-PC at the scope, then process on Mac later. If you are Mac-only, a DSLR that records to SD card is far less hassle.