Last Updated: October 18, 2026
If you want to watch a 3D printer from your desk or another room, you don’t need a special “3D printer camera.” Most people just use a standard USB webcam plugged into a computer, a Raspberry Pi running OctoPrint, or a laptop sitting next to the printer. What matters is focus distance, low light performance, and how you plan to mount it.
I’ve run this setup both ways: a cheap fixed-focus webcam on a Pi for failure checks, and a better autofocus webcam for timelapses I actually wanted to share. The cheap one was fine for catching spaghetti failures. The better one was worth it only when video quality mattered.
📄 In This Review
What actually matters for a printer webcam
Forget 4K and background blur. For a printer you need three things. First, close focus. Your camera will sit 12-24 inches from the nozzle. Many work webcams are tuned for 3+ feet and will make the print bed a soft blur. Second, usable image in dim light. Printers sit in garages, basements, and enclosures with one LED strip. A sensor that falls apart into noise at night is useless for overnight prints. Third, stable mounting and manual control over exposure and white balance.
The most common failure mode I see is autofocus hunting. An autofocus work webcam will lock onto your face perfectly, then pulse in and out when pointed at a moving print head, a shiny PEI sheet, or through an enclosure door. Fixed-focus cameras avoid that entirely, but if you buy the wrong one, everything under 2 feet is out of focus and you can’t fix it. Check the stated minimum focus distance before you buy.
The three practical options
See also: Best Monitor for MacBook Air: Two USB-C 4K Screens and Six Adapter-Dependent Alternatives • Best Monitor for MacBook Pro: Eight Listings Sorted by Cable, Sharpness and Scaling
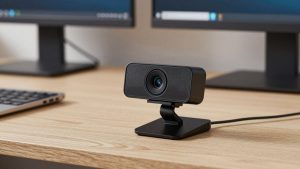
1. Cheap 1080p fixed-focus webcam: This is enough for most people. You get a 70-80 degree field of view, no autofocus to hunt, and it works plug-and-play with OctoPrint, Obico, Klipper + Crowsnest, or just Zoom / QuickTime if you’re using a laptop. Image quality in daylight is perfectly readable – you can see layer lines, stringing, and whether the first layer stuck. In a dark enclosure it gets grainy, but you can still tell if the print failed.
Who it suits: Anyone who just wants a failure monitor and to check progress from work. Be honest here: if you’re not making timelapses, stop here. A basic 1080p fixed-focus webcam taped to a shelf does the job.
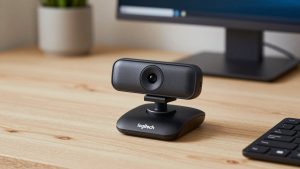
2. Mid-range 1080p autofocus webcam with good low light: This is the sweet spot if you also take work calls on the same camera, or you want cleaner timelapses. Better sensors hold up under warm enclosure LEDs without turning orange, and glass lenses hold focus on the nozzle instead of the enclosure reflection. Look for one where you can lock focus and exposure in software – Logitech Capture, OBS, or v4l2-ctl on Pi – otherwise you’ll get that breathing effect.
Who it suits: Home office users who want one camera that does double duty for meetings by day and printer duty by night. An autofocus 1080p webcam with manual focus lock is easier to live with than juggling two cameras.
3. Wide-angle 2K / 4K webcam: Only makes sense if you monitor multiple printers with one camera, or you crop in digitally to watch the nozzle. Full 4K over a Pi will stutter and overheat the Pi – most people end up running it at 1080p anyway. The real benefit is a sharper 1080p crop, not true 4K streaming. It also costs more and needs more light and more USB bandwidth.
Who it suits: Small print farms, or if you want detailed timelapses for YouTube. For a single Ender / Prusa / Bambu in a bedroom office, it’s overkill.
| Use case | What to buy | Focus to look for | Trade-off |
|---|---|---|---|
| Just check for failures from phone / work PC | Basic 1080p fixed-focus | Fixed, ~12 in minimum | Grainy at night, but reliable and cheap |
| One camera for Zoom + printer | Mid-range 1080p autofocus | Autofocus with software lock | Needs setup to stop focus hunting |
| Timelapses to share | Better 1080p / 2K with manual exposure | Manual focus + manual white balance | More tweaking, needs good lighting |
| 2-3 printers on one shelf | Wide-angle 90+ degree camera | Fixed wide, mount 3-4 ft back | Edges distort, less nozzle detail |
Setup that avoids headaches
Mounting matters more than megapixels. Clamp the camera to something that doesn’t vibrate. If you clip it to the printer frame itself, especially a bed-slinger, every layer change shakes the image and autofocus models will hunt. A separate tripod, shelf mount, or articulated arm a foot to the side is much more stable. Aim slightly down at the bed, not straight through the door – straight-on shots pick up glare from acrylic doors and LED strips.
Light it like you mean it. A $10 USB LED bar inside or above the enclosure does more for image quality than jumping from 1080p to 4K. Set white balance once with the LEDs on, then lock it. If you leave everything on auto, the image will swing from blue to orange every time the bed heater cycles or the room light changes. In OctoPrint, drop the framerate to 10-15 fps at 1280×720 for remote viewing; it stays smooth on mobile data and keeps the Pi from throttling.
For software: OctoPrint and Mainsail / Fluidd both handle standard UVC webcams with no drivers on Mac, Windows, Linux, and Pi. If you’re just using a spare work laptop next to the printer, OBS or even a private Discord / Zoom call to yourself is a zero-setup monitor. For spaghetti detection, Obico works with most UVC cameras, but needs decent lighting – it will false-alert a lot on a noisy dark feed.
What not to buy
Don’t buy a privacy-shutter work webcam with no way to remove the shutter mount if you plan to put it inside an enclosure – heat softens the plastic and the shutter droops into frame. Don’t buy a 60fps gaming webcam just for the printer; you’ll never use 60fps for monitoring and low-light suffers. And don’t put an expensive Mac-compatible 4K webcam inside a hot ABS / ASA enclosure full-time. Heat and fumes will haze the lens over months. Use a cheap cam inside, keep the good cam outside looking in.
If you use a Mac as your print server, check that the camera allows settings control in macOS. Many Windows-only utilities are needed to turn off autofocus or auto exposure. A simple flexible tripod arm for webcam and a camera that remembers its settings after unplug will save you from resetting focus every print.
Which should you get?
For most single-printer owners: buy the cheapest 1080p fixed-focus webcam with a stated close focus under 18 inches, add light, mount it off the printer. Total cost stays low and you can see failures clearly.
Get the better autofocus model only if you will also use it for work calls, or you care about timelapse quality and are willing to lock focus and exposure manually. Otherwise you are paying for features that make printer footage worse, not better.
FAQ
Can I use my work webcam for my 3D printer?
Yes, if it’s a standard USB UVC webcam. Unplug it from your work laptop or dock and plug it into your Pi or spare computer running OctoPrint or Klipper. Just lock focus and exposure for the short distance to the bed.
Why is my printer webcam blurry up close?
Most webcams are focused for 3 feet and beyond for video calls. At 12 inches from the nozzle they are out of their range. Move the camera back to 2-3 feet or switch to a model with close focus or manual focus.
Do I need 4K for monitoring prints?
No. 720p is enough to spot a failed print, 1080p is enough for timelapses. 4K adds CPU load, USB issues on a Pi, and needs more light. Better lighting improves clarity more than more pixels.
Is it safe to put a webcam inside an enclosure?
For PLA with low chamber temps, usually yes. For ABS / ASA / PC with chamber temps over 45-50C, keep the camera outside looking through the door to avoid heat damage, and check the manufacturer’s temperature rating.