Last Updated: October 18, 2026
- The Built-In Camera Is the Problem
- What to Check Before You Buy for Mac
- Quick Comparison: Which Type Suits You
- Best for Most People: 1080p Autofocus Webcam
- Best Upgrade: QHD / 1440p for All-Day Calls
- Best for Recording: 4K Webcam
- Before You Buy: Try Continuity Camera
- Setup That Matters More Than the Model
- FAQ
📄 In This Review
- The Built-In Camera Is the Problem
- What to Check Before You Buy for Mac
- Quick Comparison: Which Type Suits You
- Best for Most People: 1080p Autofocus Webcam
- Best Upgrade: QHD / 1440p for All-Day Calls
- Best for Recording: 4K Webcam
- Before You Buy: Try Continuity Camera
- Setup That Matters More Than the Model
- FAQ
The Built-In Camera Is the Problem
Even the newer MacBook Pro models with a 1080p FaceTime camera still look soft in real meetings. Apple improved the sensor, but it is still small, fixed-focus on most models, and stuck at a low angle when the laptop sits on a desk. In Zoom, Teams, or Google Meet, that means waxy skin tones, blown-out windows behind you, and noise as soon as your home office light drops in the afternoon.
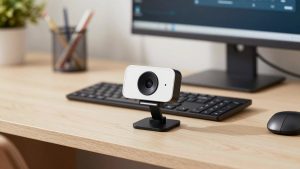
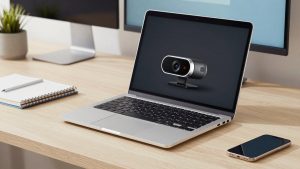
An external HD camera for MacBook Pro fixes three things at once: a larger sensor for cleaner low light, autofocus that keeps you sharp if you lean in and out, and better placement. You can lift the camera to eye level on a monitor instead of looking down at a laptop keyboard. For anyone on calls 3+ hours a day, that upgrade matters more than jumping from 1080p to 4K.
What to Check Before You Buy for Mac
See also: Best Monitor for MacBook Air: Two USB-C 4K Screens and Six Adapter-Dependent Alternatives • Best Monitor for MacBook Pro: Eight Listings Sorted by Cable, Sharpness and Scaling
Most modern USB webcams are plug-and-play on macOS, but Mac users hit specific annoyances. First, check the connector. MacBook Pro models are USB-C only, so you either want a webcam with a native USB-C cable or budget for a short USB-A to USB-C adapter. A loose dongle chain is the number one cause of disconnects I see.
Second, ignore Windows-only features. Auto-framing, background blur, and manual exposure sliders often live in a Windows app with no Mac version. On Mac, you want the camera to look good with default settings in FaceTime, Zoom, and QuickTime Player, without software. Look for physical privacy shutters, hardware autofocus, and on-camera noise-reducing mics instead of app promises.
Third, think about 1080p vs. 1440p vs. 4K practically. For calls, 1080p at 30fps or 60fps with good light handling beats a cheap 4K sensor every time. 4K only pays off if you crop in for demos, record YouTube or course videos, or want sharper virtual backgrounds. It also uses more CPU and USB bandwidth, which can make a MacBook run hot on long calls.
Quick Comparison: Which Type Suits You
| Type | Best for | Strengths | Trade-offs |
|---|---|---|---|
| Budget 1080p autofocus webcam | Daily Zoom / Teams workers | Cheap, reliable, good enough in daylight | Weak low light, narrower field of view |
| Mid-range 1440p (QHD) webcam | Home office pros on calls all day | Sharper than 1080p, better mics and auto exposure | Slightly more CPU load, needs good USB-C connection |
| Premium 4K webcam | Creators, coaches, course sellers | Detailed image, cropping room, best lenses | Expensive, can expose bad lighting, heavier files |
| iPhone as Continuity Camera | Travel or temporary setup | Excellent image with no new hardware | Mount fiddling, battery drain, mic handoff quirks |
Best for Most People: 1080p Autofocus Webcam
If you just want to look clear and professional without thinking about settings, a basic 1080p webcam for MacBook Pro is still the smart buy. Pick one with true autofocus (not fixed focus), dual microphones, and a 78- to 90-degree field of view. That width fits one person naturally without showing your whole room.
Where cheaper options fail: low light and auto-exposure hunting. In a dim room, a $35 no-name 1080p camera will pump brightness up and down when you move, and faces go orange under warm bulbs. A slightly better 1080p model with a larger lens and light correction holds exposure steadier. It will not match a mirrorless camera, but for standups and client calls, no one will complain.
Who should stop here: remote employees, students, and anyone using a laptop on Wi-Fi in a shared apartment. The cheaper option is fine if you add one $25 desk lamp in front of you. Light matters more than pixels.
Best Upgrade: QHD / 1440p for All-Day Calls
The sweet spot for MacBook Pro in 2025-2026 is 1440p. You get visibly sharper text if you hold up documents, cleaner edges for Zoom background blur, and usually much better microphones than budget 1080p sticks. Many mid-range models also handle mixed lighting better – like a bright window to one side and a dark wall to the other.
Trade-off to know: some QHD cameras default to heavy sharpening and smoothing on Mac because you cannot turn it off without the Windows app. Test it in Photo Booth first. If your face looks waxy, back the camera up 2-3 feet and add frontal light instead of sitting 18 inches away. That alone fixes most over-processing.
A 2K QHD webcam with USB-C Mac compatibility is ideal for managers, sales calls, therapists, tutors, and anyone whose face is on screen for income. It is also easier on older Intel MacBook Pros than full 4K, which can stutter at full resolution in Teams.
Best for Recording: 4K Webcam
Get 4K only if you record. For live calls, Zoom and Meet compress you to 720p or 1080p anyway, so viewers will not see 4K. For recordings in QuickTime, OBS, or Descript, 4K gives you room to crop from wide to medium without turning mushy, and looks better on YouTube.
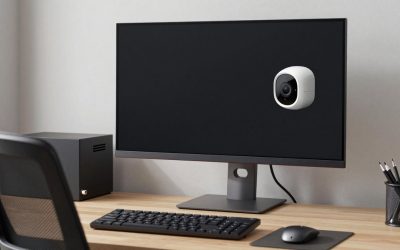
Failure modes are real here. Cheap 4K webcams use tiny sensors that look worse in low light than a good 1080p camera, and they run warm. You also need to mount them solidly – a 4K sensor shows every wobble from a laptop lid or cheap clip. Put it on an external monitor or a small tripod at eye level, plug directly into the MacBook Pro (not a cheap hub), and keep a window or key light in front of you, not behind.
A 4K autofocus webcam for MacBook Pro suits creators, course teachers, and founders who do demos and want to zoom into product details in post. For pure meetings, save the money.
Before You Buy: Try Continuity Camera
If you own a recent iPhone, try it as your Mac webcam first. In macOS Ventura and later, Continuity Camera is built in and often beats a $100 webcam for sharpness and low light. It works wirelessly or wired, and Desk View can show your desk for demos.
Why people still buy a dedicated webcam: mounts are fiddly, the phone gets hot and drains, and calls can drop when a notification or call comes in. If you take calls from the same desk daily, a dedicated camera that is always mounted and always ready wins on convenience.
Setup That Matters More Than the Model
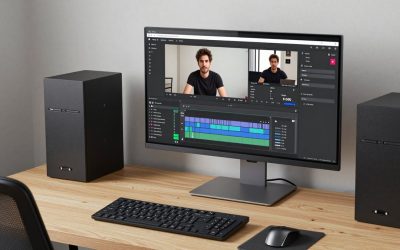
No HD camera will save backlight. Face a window or put a soft white lamp behind your monitor, at face height. Keep the lens at or slightly above eye level – stack your MacBook on books or use an external monitor with the camera on top. In Zoom, turn off “Touch up my appearance” if you bought a good camera; it just adds blur. In Teams, set the camera to 1080p in Device Settings if available, and close Chrome tabs capturing the camera twice.
For audio, do not assume the webcam mic is enough. Webcam mics are fine for short internal calls, but in a echoey room they pick up keyboard and fan noise. If clients complain you sound distant, keep the webcam for video and add wired earbuds or a USB mic. That combo beats any all-in-one upgrade.
FAQ
Do I need drivers or software on MacBook Pro?
No, for most USB webcams. macOS recognizes them as UVC devices in Zoom, Teams, Meet, FaceTime, and OBS. Avoid models that require a Windows-only app to enable autofocus or 4K.
Will a webcam work with USB-C hubs and docks?
Usually yes, but plug directly into the MacBook Pro if you get freezes or flicker. Cheap hubs starve 1440p and 4K cameras of power and bandwidth. Use USB-C to USB-C or a short, quality adapter.
Is 4K worth it for Zoom and Teams?
Not for live calls alone. Those apps compress video heavily, so a good 1080p or 1440p camera with good light looks the same to others. Buy 4K if you record video and want cropping flexibility.
Why does my external webcam look darker than the built-in camera?
Apple auto-brightens aggressively. External cameras are more honest. Add frontal light, disable auto-exposure compensation in your meeting app if available, and avoid sitting with a bright window behind you.
Related Reviews & Guides
Best Webcams for Spelltable
Best Photo Scanner: Our Top Picks for 2026