Last Updated: October 18, 2026
📄 In This Review
What Macs need differently
Most modern webcams work on Mac because they use UVC, the standard USB video protocol macOS supports without drivers. Plug into USB-C directly or with a good adapter and the camera shows up in Zoom, Teams, Google Meet, FaceTime, and QuickTime. That is the good news.
The frustration for Mac users is everything around that basic image. Windows-only software controls a lot of features like AI framing, background blur, firmware updates, and manual exposure. On Mac you often get basic plug-and-play but no settings app, or a stripped-down web version. If you want to tune field of view, autofocus behavior, or noise reduction on macOS, check before you buy whether the maker actually ships a Mac app. Many do not.
Also watch the port situation. Most MacBooks now are USB-C only. A lot of affordable webcams still ship with a fixed USB-A cable. That works, but you will live on a dongle or dock. A native USB-C cable or detachable USB-C to USB-C cable is worth paying a little extra for if you move between desk and laptop bag.
First decide: iPhone as webcam or dedicated webcam?
See also: Best Monitor for MacBook Air: Two USB-C 4K Screens and Six Adapter-Dependent Alternatives • Best Monitor for MacBook Pro: Eight Listings Sorted by Cable, Sharpness and Scaling
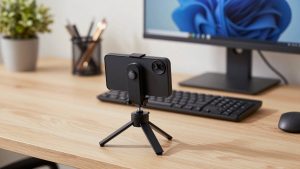
Since macOS Ventura, you can use a recent iPhone as your Mac webcam wirelessly or wired via Continuity Camera. Image quality is excellent, especially in mixed light, because the iPhone sensor and processing are years ahead of most $80 webcams. If you already own a compatible iPhone and a stand or MagSafe mount, try this first. It costs nothing.
Where a dedicated webcam still wins is friction. Continuity Camera sometimes fails to connect when you are rushing into a meeting, drains phone battery, ties up your phone so you cannot take notes on it, and the mount angle is fiddly.overheating on long calls can also cause dimming. If you take 4-6 calls a day, share a desk, or need something family members can use without pairing, a fixed USB camera is more reliable.
Practical rule: use Continuity Camera if you do 1-2 calls per day and care about image quality on a budget. Buy a dedicated camera if you want one-click reliability, a wide shot that fits a whiteboard, or a setup that stays put.
What to buy for video conferencing on Mac
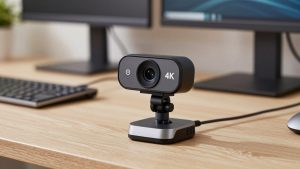
For most home-office Mac users, a good 1080p business webcam is enough. Zoom, Teams, and Meet still compress to 1080p or 720p for most participants, so a clean 1080p sensor with good autofocus and dual noise-canceling mics will look better in a real meeting than a cheap 4K sensor that hunts for focus. Look for a model explicitly listed as UVC-compliant with a Mac settings app. A simple 1080p webcam for Mac with USB-C in the $70 to $130 range covers Teams standups, client calls, and teaching.
Step up to 2K or 4K only if you crop, present, or need digital zoom without turning to mush. A higher-resolution sensor lets you use a tighter head-and-shoulders crop from a camera mounted farther back, which is useful if your desk faces a bright window. The trade-off is more heat, larger files if you record locally, and higher CPU use if you leave background effects on. Apple Silicon handles this fine, but Intel Macs and older MacBook Airs can get loud on long 4K calls. If you fall in this group, shop for a 4K webcam for Mac with autofocus that lets you force 1080p output in its Mac software.
The third category is the premium Mac-first webcam with a larger sensor, better low-light handling, and desktop software for exposure, framing, and mic modes. These cost $180 to $300 and make sense for founders, coaches, salespeople, and anyone who records courses or runs webinars from a home office. Image quality in a dim room at 7am is visibly better than a budget cam, but only if you also fix lighting. Do not buy this tier to fix a dark room. A $40 light does more than a $200 sensor upgrade.
| Setup type | Typical resolution | Best for | Mac trade-off to know |
|---|---|---|---|
| iPhone via Continuity Camera | 1080p to 4K depending on iPhone | Occasional calls, best image for $0 | Pairing fails, phone tied up, needs mount |
| Basic 1080p USB webcam | 1080p/30 | Daily Zoom/Teams, shared desks | Check for Mac settings app; avoid USB-A only if you hate dongles |
| Midrange 2K/4K webcam | 1440p or 4K/30 | Cropping, presenting, recording clips | More heat and CPU load; run it at 1080p for calls |
| Premium Mac-focused webcam | 4K with larger sensor | Client-facing video, courses, streaming | Needs good light to justify price; software quality varies |
Features that actually matter on Mac
Autofocus speed matters more than megapixels. Cheap fixed-focus cameras are fine if you sit still 2 feet away, but they blur when you lean in to show a document. Autofocus models handle that, though some pulse or hunt in low light. If the Mac app lets you lock focus or set a focus zone, use it.
Field of view is the second hidden spec. 78 to 90 degrees suits solo calls in a small office. Wider than 95 degrees will show your messy shelves and make you look distant. If you share a small conference nook, look for adjustable field of view and auto-framing, but test auto-framing on Mac first. Some makers only enable it on Windows.
Microphones are usable for calls but not for recording. Even good webcam mics pick up keyboard clatter and room echo. They are fine as a backup. If you talk all day, budget for a USB mic or headset. Also check for a physical privacy shutter. Tape works, but a built-in shutter is cleaner and prevents that moment where you join early with video on.
Mounting is a real failure mode on thin MacBook lids and curved Studio Display bezels. Heavy 4K cameras with short clips slip, especially when you open and close the lid. Look for a wide, rubberized clip plus a tripod thread. If you use an external monitor, a small mini tripod for webcam desk mount placed behind the monitor often gives a steadier, more eye-level angle than perching on top.
Cheap setup fixes that beat a new camera
Before upgrading, face a window or put a daylight-balanced LED panel behind your monitor at eye level. Raise the camera to eye level. Close heavy backlight blinds. In Zoom and Teams, turn on HD video and turn off virtual backgrounds unless you need them. They soften edges and increase fan noise, especially on Intel Macs.
If your image flickers, it is usually auto-exposure fighting overhead LEDs. Lock exposure in the camera Mac app if available. If audio echoes, lower speaker volume and move the mic closer rather than boosting mic gain. And keep one USB-C port free for the camera if you use a dock. Some cheap hubs starve the camera for power and cause freezes mid-call.
FAQ
Do I need drivers for a webcam on Mac?
Usually no. Choose a UVC-compliant camera and it will work in Zoom, Teams, Meet, and FaceTime without drivers. You may need the maker Mac app for settings like field of view, autofocus, firmware updates, and background effects.
Is 4K worth it for Zoom and Teams on Mac?
For live calls, often not. Most calls are delivered at 1080p or lower, so a sharp 1080p camera with good light looks as good as 4K. Buy 4K if you crop, zoom digitally, or record locally for YouTube or courses.
Why does my webcam look worse on Mac than on Windows?
Usually missing software features or different default exposure. Install the Mac version of the camera utility if one exists, force 1080p output, lock exposure and white balance, and improve front lighting. Also check that Teams or Zoom is not set to low bandwidth mode.
Can I just use my iPhone instead of buying a webcam?
Yes, if you have a recent iPhone and run a recent macOS version. It is excellent quality for 1-2 calls per day. Buy a dedicated webcam if you want always-ready reliability, all-day comfort without draining your phone, or a setup others can use.