Last Updated: September 29, 2026
An under-desk keyboard tray drops your typing surface 3 to 4 inches below the desktop, which changes the math on an adjustable standing desk in ways most product pages never mention. On a typical electric standing desk with a height range of 22.5 to 48.5 inches, adding a tray means your real typing height runs from roughly 19 to 44.5 inches, not the number printed on the spec sheet. That shift matters more than it sounds, especially at the low end, where knee clearance and the desk’s leg crossbar can turn a good tray into one you can’t actually use while sitting.
📄 In This Review
Why the tray height matters more than the desktop height
Manufacturers advertise desktop height range, but your wrists interact with the tray, not the desktop. A desk listed as adjustable from 22.5″ to 48.5″ is measuring the work surface. Once you clamp on a keyboard tray, the typing plane sits below that by whatever the tray’s drop distance is, typically 3″ to 4″ depending on the mounting arm and tray thickness.

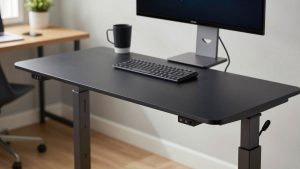
ErGear Electric Standing Desk with Keyboard Tray, 44x24 Inches Adjustable Height Sit Stand Up Desk, Home Office Desk Computer Workstation, Black
Included for 'Adjustable Standing Desks With Keyboard Trays: How They Change Your Typing Height' because the listing specifies 44x24 Inches Adjustable Height Sit Stand Up Desk and Home Office Desk Computer Workstation, details this guide uses to compare options.
View on Amazon
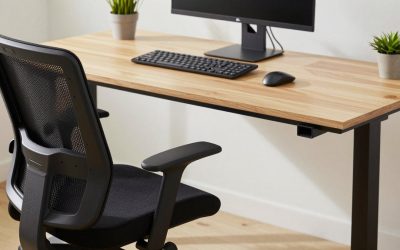
AODK 55 Inch Standing Desk with Drawers & Keyboard Tray, Rustic Brown
Included for 'Adjustable Standing Desks With Keyboard Trays: How They Change Your Typing Height' because the listing specifies Rustic Brown, details this guide uses to compare options.
View on Amazon
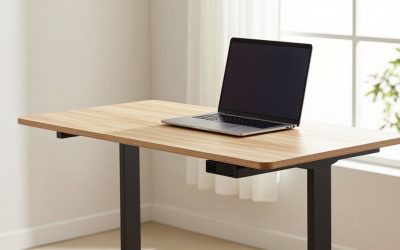
OffiGo 55 Inch U Shaped Electric Standing Desk with Keyboard Tray, White
Included for 'Adjustable Standing Desks With Keyboard Trays: How They Change Your Typing Height' because the listing specifies White, details this guide uses to compare options.
View on Amazon
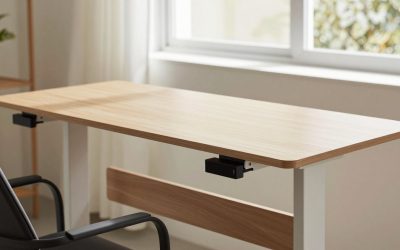
Agilestic 48 Inch Standing Desk with Drawers & Keyboard Tray, Rustic Brown
Included for 'Adjustable Standing Desks With Keyboard Trays: How They Change Your Typing Height' because the listing specifies Rustic Brown, details this guide uses to compare options.
View on AmazonThat drop is a feature when you’re sitting, since it puts your forearms at a proper 90-degree angle without forcing you to raise the whole desk. But it becomes a liability at the top of the desk’s range, because the tray doesn’t rise with the same headroom it had at desktop height. If you like to stand at your tallest comfortable typing height, subtracting 3-4 inches from the desk’s max height can put the tray closer to your torso than expected, especially for users over 6 feet tall.
What the shifted range actually looks like
| Measurement | Desktop-only reference | With keyboard tray (4″ drop) |
|---|---|---|
| Minimum height | 22.5 in | 18.5 in |
| Maximum height | 48.5 in | 44.5 in |
| Typical seated typing height (ANSI/HFES guideline) | 23-28 in | Achieved with desk at 27-32 in |
| Typical standing typing height for 5’9″ user | 38-40 in | Achieved with desk at 42-44 in |
The practical effect: a height adjustable desk with keyboard tray usually needs to run 3-4 inches higher than its unmounted equivalent to hit the same ergonomic typing plane, both sitting and standing. If you’re tall and were already pushing the desk near its ceiling for comfortable standing typing, a tray can eat into headroom you didn’t know you were relying on.
The knee-clearance problem
See also: Best 49 Inch Monitor: Eight Super Ultrawides Compared by Bandwidth and Desk Depth • Working Table for Home: Sit-Stand and L-Shaped Setups Compared
This is where a lot of trays fail in practice rather than on paper. Dropping the tray 3-4 inches below the desktop also drops it closer to your thighs. On a desk with 26-28 inches of usable knee clearance under the desktop, a tray mounted at a 4-inch drop can leave as little as 22-24 inches between the tray’s underside and the floor once you account for the tray’s own thickness (usually 1 to 1.5 inches) and the mounting arm’s vertical profile.
For reference, most ergonomic guidelines call for at least 24 inches of clearance between seat height and the underside of a work surface for average-height adults, more for taller users or bulkier chairs. A tray that eats into that margin forces you to sit farther back, angle your knees, or raise the whole desk higher than you’d otherwise want, which then pushes your standing height into the same headroom problem described above.
Crossbar conflicts on certain frames
Electric standing desks with dual-motor lifting columns often have a horizontal support crossbar running between the legs, usually mounted 1 to 3 inches below the desktop for structural rigidity. On single-motor or C-leg frames, this bar sometimes sits lower, closer to where a keyboard tray’s mounting bracket needs to clamp.
This creates two real conflicts:
- Bracket collision: Under-mount trays that clamp to the underside of the desktop can hit the crossbar directly, especially C-shaped and grommet-clamp brackets. Track-mounted trays with a slimmer rail profile tend to clear better.
- Knee-crossbar sandwich: Even when the bracket clears, the tray plus crossbar together can reduce knee clearance to under 20 inches on some compact or budget frames, which is tight for anyone over 5’6″ sitting in a standard task chair.
Before buying a tray for an existing desk, measure the distance from the underside of the desktop to the top of the crossbar. Anything under 3.5 inches is a warning sign for most clamp-style trays; you’ll likely need a low-profile or track-style mount, or a desk frame without a crossbar (many single-column and some triple-motor frames route bracing differently, through the legs rather than a center bar).
Matching the setup to your situation
| Your situation | Recommended approach |
|---|---|
| Sit most of the day, occasional standing | Standard tray with 3-4″ drop; desk range 22.5-48″ is plenty since you’re rarely pushing the top end |
| Stand most of the day, tall (6’1″+) | Skip the tray or use a shallow-drop (2″) model; verify the desk’s max height minus drop still clears your elbow height standing |
| Desk has a visible crossbar under 3.5″ from desktop | Use a track-mounted, low-profile tray, or choose a frame without a center crossbar |
| Want drawers and a tray | Choose a standing desk with keyboard tray and drawers designed as one unit; aftermarket trays and add-on drawer units mounted on the same rail system often collide with each other’s brackets |
| Shorter users (under 5’4″) | Prioritize a low minimum height (under 23″) over max height; tray drop works in your favor for seated typing but check standing minimum isn’t too low to bend over |
Drawers change the clearance math again
A standing desk with keyboard tray and drawers adds a third variable. Drawer units typically mount at or just below desktop level, in the same vertical zone the keyboard tray’s mounting arm needs. On desks not designed to carry both, you’re often choosing between centering the drawer or centering the tray, since the arm and drawer slides can occupy overlapping bracket space. Desks sold as complete units with both features built in avoid this by routing the tray on a lower rail and the drawer on a separate frame-mounted rail, rather than both clamping to the same lip of the desktop.
If you’re retrofitting an existing desk, check the drawer unit’s mounting depth first (commonly 2-3 inches of desktop lip needed) and confirm it doesn’t overlap the zone your tray bracket needs.
Quick checklist before buying
- Confirm the desk’s minimum height minus tray drop still clears your knees when seated (aim for 24″+ from seat to tray underside).
- Confirm the desk’s maximum height minus tray drop still reaches comfortable standing elbow height for your specific height.
- Measure crossbar clearance under the desktop before ordering a clamp-style tray.
- For electric standing desks with keyboard trays, test the tray at both the lowest and highest saved presets, not just mid-range, since drop distance affects each end of the range differently.
- If adding drawers too, check bracket overlap before buying tray and drawer separately.
Related Reviews & Guides


Standing Desk Won’t Go Up? 9 Fixes to Try Before You Call Support
30 Inch Deep Standing Desk: Room to Work and Stay Organized