Last Updated: October 18, 2026
📄 In This Review
Why Mac users want a webcam with light
Most MacBook cameras are usable but not flattering in a dim home office. Apple prioritizes a thin lid over a large sensor, so in evening light you get soft detail, noisy shadows, and that gray, tired look on Zoom or FaceTime. An external webcam with a built-in light solves the two problems at once: a bigger sensor for sharper 1080p or 4K, plus a small fill light to even out your face without lighting up the whole room.
On a Mac Mini, Mac Studio, or a docked MacBook with an external display, it matters even more. Those machines have no camera at all, or the lid is closed. If you are buying one accessory to fix how you look on calls, a light plus camera combo is more effective than buying either one separately and guessing.
What to check for macOS compatibility
See also: Best Monitor for MacBook Air: Two USB-C 4K Screens and Six Adapter-Dependent Alternatives • Best Monitor for MacBook Pro: Eight Listings Sorted by Cable, Sharpness and Scaling
Macs are picky in specific ways. Look for a webcam listed as UVC-compliant and driver-free for macOS. That means it should work in FaceTime, Zoom, Teams, Google Meet, and Photo Booth without installing software. Many Windows-focused features — AI framing controls, background blur tuning, granular exposure sliders — live in a Windows-only app. On Mac you often get plug-and-play only.
Also check the mount and USB connection. Most current options use USB-C or include a USB-C adapter, which you want for MacBook Air, MacBook Pro, and Mac Studio. A heavy webcam with a stiff clip will wobble on a thin MacBook lid; a lighter 1080p model with a flat foot sits better. For Studio Display or Apple Pro Display users, measure the top bezel thickness — some clamp bases will not grip and leave the camera pointing slightly down.
For the light itself, brightness control is more important than raw lumens. You want physical buttons or on-camera touch controls for brightness and color temperature, because you may not have Mac software to change it. Auto-adjusting ring lights that blast at full power will overexpose pale skin and reflect in glasses. A dimmable light with warm to cool settings (around 3200K to 5600K) is far more useful.
The three setups that actually work
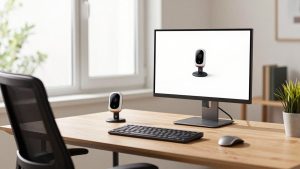
The first option is an all-in-one webcam with built-in light for Mac. These have a small LED bar or ring around the lens. Strength: one cable, one device, no extra stand. You clip it on and you look instantly better in a dark bedroom or late call. Weakness: the light is close to the lens, so it can look flat, create glasses glare, and cause harsh hot spots on forehead if you sit less than two feet away. Best for laptop workers who want simplicity and travel with the same setup.
The second option is a good 1080p Mac-compatible webcam plus a separate clip-on monitor light. This is what I recommend for most home offices. A separate light sits a few inches above or to the side of the lens, which looks more natural and reduces red-eye and glasses reflection. It also lets you keep using a webcam you already like. The trade-off is desk clutter and a second USB cable or battery to charge. If you wear glasses or do calls 4+ hours per day, this setup is noticeably more comfortable.
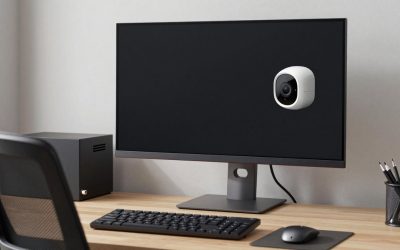
The third option is a 4K webcam with a larger light panel, meant for a fixed desk with an external monitor. These are bulkier and more expensive, but they hold up better if you present, teach, or record. The failure mode here is macOS software: you may pay for 4K and auto-framing you cannot fully adjust on a Mac. Before buying, check recent Mac reviews specifically, not just the box that says Works with Mac. For many office workers, 1080p is fine and cheaper — 4K only pays off if you crop, present full-screen, or want better low-light detail.
Comparison: integrated vs. separate light
| Setup | Image quality in low light | Ease on Mac | Biggest downside | Best for |
|---|---|---|---|---|
| 1080p webcam with integrated ring light | Good for calls, can overexpose up close | Excellent, usually plug-and-play | Glasses glare, flat look | MacBook users, travelers, simple late calls |
| 1080p webcam + separate clip-on video light | Very good, more natural skin tones | Excellent, no software needed | Two devices to mount and power | Glasses wearers, daily Zoom/Teams users |
| 4K webcam with built-in light panel | Best detail, handles backlight better | Mixed, advanced features may need Windows | Price, size, lid wobble | Presenters, teachers, fixed home office |
| Studio Display / MacBook camera + monitor light bar | Decent, limited by small Apple sensor | Excellent, uses built-in camera | No framing or placement control | Minimalists who will not mount a camera |
If budget is tight, be honest with yourself about your room. If you have a window in front of you during the day and only do occasional calls, the cheaper option is fine: keep your current webcam and add a $25 dimmable clip light. Do not buy a 4K lighted webcam just for a weekly standup. Spend the difference on a stable mount and a quiet room.
How to set it up on a Mac so you do not look washed out
Start with the light at 25-40% brightness, daylight-balanced, about arm’s length away. Open Photo Booth or FaceTime and turn off any auto low-light boost in Zoom under Video settings if your face is glowing. Mac apps tend to auto-expose aggressively; lower light plus a small increase in exposure looks better than full blast.
Position the camera just above eye level and the light slightly above the camera, not below. Light from below creates shadows under the chin. If you wear glasses, move the light 6-8 inches to one side and tilt your screen down a degree — that kills most reflections without needing a special low glare webcam light for glasses. Close blinds behind you; no webcam light can fix a bright window directly behind your head.
For audio on a Mac, go to System Settings > Sound > Input and select the external webcam mic, then do a 10-second test in QuickTime Player. Many lighted webcams have harsh, compressed mics that pick up fan noise from a MacBook Pro. If yours sounds thin, switch back to MacBook or AirPods mic and use the webcam for video only — common and perfectly fine.
What to buy based on your work
For hybrid workers on MacBook Air or Pro: get a lightweight 1080p model with integrated light and on-device buttons. It fits in a laptop sleeve, needs no app, and you will actually bring it to the office. Look for dual noise-reducing mics and a privacy shutter. Failure mode to avoid: models that default to maximum light on every plug-in — annoying if you join calls in a bright office.
For home office with an external monitor: get a solid 1080p or 4K webcam without obsessing over the built-in light, then add a separate dimmable monitor light. A search for a Mac-compatible webcam and monitor light combo will show you paired kits, but buying separately often gives you better color control and less glare. This suits managers, therapists, tutors, and anyone on camera all day.
For presenters and creators on Mac Mini or Mac Studio: consider a 4K option with a larger light and tripod thread. Mount it on a small tripod behind your monitor for proper eye height instead of balancing it on a thin display bezel. Just confirm that 4K30 works over USB-C on Apple Silicon without dropping to 1080p, and that autofocus does not hunt during screen shares — read Mac-specific reviews for that exact complaint.
FAQ
Will a webcam with light work with FaceTime and Zoom on Mac?
Yes, if it is UVC-compliant. It should show up in FaceTime, Zoom, Teams, and Meet as a USB video device with no driver. Light brightness is usually controlled on the device itself, so you do not need Mac software.
Is an integrated light enough, or do I need a separate video light?
Integrated is enough for occasional calls in a dim room. For daily calls, glasses, or a dark office, a separate dimmable light looks more natural and causes less glare. It is also easier on the eyes over long sessions.
Is 4K worth it for work calls on a Mac?
Usually not. Most work apps stream at 1080p or 720p anyway. Buy 4K only if you present full-screen, record content, or want better cropping and low-light detail — and only if Mac reviewers confirm full resolution works without Windows software.
Why do I still look overexposed with the light on?
You are likely too close or at 100% brightness with auto-exposure on. Move back to 2-3 feet, drop the light to one-third, set a neutral white tone, and turn off Touch Up or Low-Light Adjustment in your meeting app until skin tones look even.
Related Reviews & Guides
6 Best Laptop Docking Stations With Stand 2026
Best Webcam for Conference Calls