Last Updated: October 18, 2026
Mac Studio does not have a built-in camera, microphone array, or speakers worth relying on. That is actually good news. You are not stuck with a mediocre laptop webcam. You get to choose, but you also have to solve mounting, microphone, and lighting yourself.
Most Mac Studio owners use one of three setups: an iPhone as a webcam via Continuity Camera, a dedicated USB webcam mounted on an external monitor, or a mirrorless camera / action cam used as a webcam for high-end video. For daily Zoom, Teams, and Google Meet, the first two cover 95 percent of people.
📄 In This Review
Start here: iPhone as webcam vs. dedicated USB webcam
If you already own a recent iPhone, try Continuity Camera first before you buy anything. On macOS Ventura and later, your Mac Studio can use a nearby iPhone wirelessly or wired as the camera, microphone, and even overhead Desk View camera. Image quality is better than almost any sub-$200 webcam, especially in a dim home office.
The trade-off is friction. Wireless Continuity Camera sometimes takes 5-10 seconds to connect when a call starts. It will also drain the iPhone battery if you do back-to-back calls, and you need a solid way to hold the phone. A cheap tripod works, but on a monitor a purpose-built Continuity Camera mount for iPhone and Mac is much more stable and keeps eye level correct. Get a MagSafe mount if you want to snap on and off quickly, and plug in a Lightning or USB-C cable for all-day calls.
A dedicated USB webcam is better if you want walk-up-and-talk simplicity. No phone to dock, no battery worry, no handoff delay. Anyone else in the house can use the Mac Studio for calls without borrowing your iPhone. That matters a lot for shared offices.
What works best on Mac Studio in practice
See also: Best Monitor for MacBook Air: Two USB-C 4K Screens and Six Adapter-Dependent Alternatives • Best Monitor for MacBook Pro: Eight Listings Sorted by Cable, Sharpness and Scaling
For most desks, a fixed-focus or fast-autofocus 1080p webcam with good auto-exposure beats a finicky 4K webcam. Mac Studio handles 4K easily, but Zoom and Teams usually compress you to 720p or 1080p anyway. What your coworkers actually see is exposure, white balance, and sharpness on your face, not sensor megapixels.
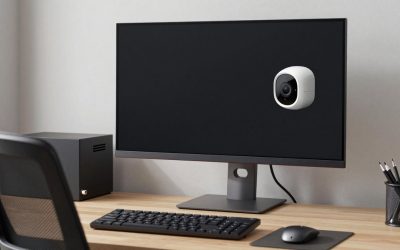
Look for three things: UVC plug-and-play with no driver required, a standard tripod thread or solid monitor clip, and a wide enough field of view for your room. Most people want 65 to 78 degrees. Go wider than 85 degrees only if you need to show two people or a whiteboard. Ultra-wide makes you look small and distant.
If you want 4K for cropping, recording, or future-proofing, buy one with on-device autofocus you can lock. The common failure mode on Mac is hunting focus: the camera pulses in and out during a call because macOS, Zoom, and the camera are all trying to adjust at once. Models that let you set focus once in their Mac app and save it are far less annoying than fully automatic ones.
Audio is the other half. Almost every webcam microphone sounds thin and picks up keyboard and room echo. It is usable for a quick call, but for daily work you will sound dramatically better with a separate USB mic or headset. Even a basic USB desktop microphone for Mac placed 12 inches away beats any webcam mic at 3 feet.
Comparison: three proven setups
Do not overthink resolution. Pick based on how you work.
| Setup | Best for | Strengths | Weaknesses |
|---|---|---|---|
| iPhone via Continuity Camera | Owners of iPhone 11 or newer who want best image for $0-$30 | Excellent low light, Center Stage, Desk View, Portrait mode, no extra camera to update | Phone is tied up, wireless can lag on join, needs mount and often a charging cable |
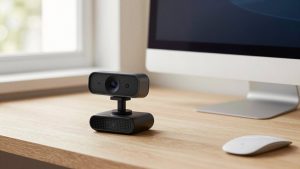
| Midrange 1080p USB webcam | Daily Zoom / Teams users who want zero fuss | Always attached, instant on, simple privacy shutter, works for any user account | Worse in low light than iPhone, built-in mic is mediocre, cheap clips slip on curved monitors |
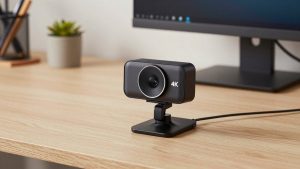
| 4K USB webcam | Presenters, coaches, creators recording locally | Sharper local recordings, digital zoom and framing options, better lens options | More CPU load, focus hunting, needs good light to actually look 4K, costs more for little benefit in live calls |
If you use Studio Display, you already have a 12MP Center Stage camera built in. It is convenient but soft, especially in low light. Many Studio Display owners still add an external webcam on top for important calls and keep the built-in as backup. Check your monitor thickness before buying a clip-on model. Some heavy 4K cameras droop forward on thin-bezel displays unless they have a tripod thread you can use with a small 4K USB webcam for Mac Studio mounted separately.
Mounting, light, and Mac-specific setup issues
Mounting matters more than specs. The camera should be at or slightly above eye level, about arm’s length away, centered. On a 27-inch or 32-inch monitor that usually means clipped to the top bezel. On an ultrawide or stacked setup, a mini tripod behind the monitor often gives a more natural angle than a high clip looking down at you.
Lighting is the cheapest upgrade. Face a window if you can, or put a $30 LED panel behind your monitor at 30-40 percent brightness. Without it, even a good camera will boost gain and look grainy. With it, even a basic 1080p camera looks clean. Avoid a bright window or lamp directly behind you. Mac webcams do not handle backlight well and you will become a silhouette.
On the software side, keep it simple. Mac Studio connects best with a direct USB-C to USB-C cable or a powered hub. Cheap unpowered USB-A adapters are a common source of disconnects and flicker. If your camera supports a Mac settings app, install it once to set field of view, turn off auto low-light flicker correction if you see banding under LEDs, and disable face-tracking zoom if it makes you seasick. Then quit the app. You do not want two apps fighting for the camera during Teams calls.
Privacy shutters stick. Test yours monthly. The thin plastic slider on many webcams jams with dust and then people stop using it. If you handle sensitive work, use macOS camera permissions plus a physical shutter, not just the in-app mute.
Which should you buy
Buy nothing first if you have an iPhone 12 or newer. Test Continuity Camera for a week wired and wireless. If the workflow annoys you, then buy hardware.
The cheaper 1080p option is fine if you do mostly internal calls, take calls from a reasonably lit room, and will use headphones or a separate mic. Do not pay extra for 4K, AI tracking, or gesture controls you will turn off after day two. Spend the savings on light and audio.
Pay more for 4K only if you record tutorials, coach clients on video, or crop in to hide office clutter while staying sharp. In that case, prioritize a model with good Mac software, manual focus lock, and tripod mounting. And budget for light. A 4K sensor in a dark room looks worse than 1080p in a lit room.
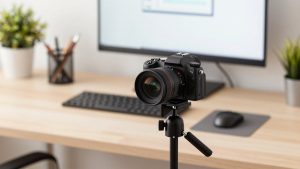
Avoid mirrorless-as-webcam unless video is your job. Yes, a Sony or Canon with a clean HDMI to USB capture looks amazing. It also means batteries, overheating on long calls, lenses to dust, and a camera that cannot be used for photos while you work. For a work Mac Studio, reliability beats cinema blur.
FAQ
Does Mac Studio have a built-in webcam or microphone?
No. You need an external camera and microphone or headset. macOS will default to your monitor or webcam mic if you do not select one, so check Sound and Video settings in Zoom and Teams after you plug in.
Can I use my iPhone as a Mac Studio webcam?
Yes. With macOS Ventura or later and an iPhone 11 or newer on the same Apple ID and Wi-Fi, select your iPhone as the camera in FaceTime, Zoom, or Photo Booth. For stability on long calls, connect with a cable and use a monitor mount to hold the phone at eye level.
Is 4K worth it for Zoom and Teams on Mac Studio?
Usually not for live calls. Most meetings stream at 720p to 1080p after compression. 4K helps for local recording, digital zoom, and cropping. If you buy 4K, make sure you have good frontal light and a way to lock focus, otherwise you will not see the benefit.
Why does my webcam disconnect or flicker on Mac Studio?
It is almost always power or hub related. Plug directly into the Mac Studio if possible, use a powered hub for long runs, and avoid stacking adapters. Also close other apps using the camera and turn off overlapping beauty or virtual background effects in both the camera app and Zoom.
Related Reviews & Guides
Best Camera for Live Broadcast
5 Best Desk Organizers and Accessories (2026)