Last Updated: September 18, 2026
Cable sleeves can turn a tangled desk, entertainment center, or charging station into a tidy, easy-to-clean setup—but only if you plan the route first. Done badly, a sleeve can trap dust, hide a damaged cord, restrict airflow around power bricks, or bundle cables so tightly that you cannot identify or replace one later. It can also create a safety problem if you force too many cords into one tube or cover a power cable that is warm to the touch.
This method shows how to organize cables with sleeves while keeping connections accessible and cords separated by purpose. The goal is not simply to make every wire disappear. It is to create a flexible bundle that is easy to label, clean, troubleshoot, and expand. The same approach works for a home office, TV console, gaming setup, or charging drawer in 2026.
As an Amazon Associate we earn from qualifying purchases at no extra cost to you.


Quick answer: Our top pick in 2026 is the Cable sleeve or split wire loom — our #1 rated choice. See the full ranked comparison, alternatives and buying advice below.
What You Need
| Item | Why | Optional? |
|---|---|---|
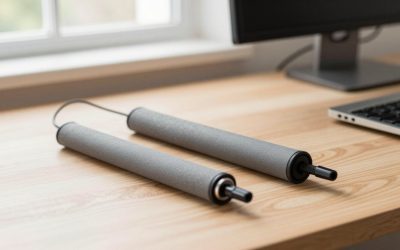
| Cable sleeve or split wire loom | Groups several cords and protects them from abrasion. A 1/2-inch split sleeve works well for a few thin USB, audio, or video cables; larger bundles may need a 1-inch or 1-1/2-inch sleeve. | No |
| Cable management kit | Hook-and-loop straps, adhesive clips, labels, and organizers help secure the sleeved bundle without permanent knots. | No, but useful |
| Scissors or utility knife | Cuts sleeve material cleanly. Use a knife carefully and cut away from your body. | No |
| Measuring tape | Prevents buying a sleeve that is too short or too narrow. | Yes |
| Labels or masking tape and a pen | Identifies both ends of each cable before bundling. | Yes |
| Dust cloth and rubbing alcohol | Cleans the mounting surface before placing adhesive clips. Allow the surface to dry completely. | Yes |
For a basic setup, a multi-piece kit such as the N NOROCME 192 PCS Cable Management Kit typically costs about $15 to $20; its listed price is $15.95. For protection around a small group of cords, the Alex Tech 10-foot, 1/2-inch split wire loom is typically about $8 to $12, with a listed price of $8.99. Check the sleeve’s actual inside diameter rather than relying only on the advertised width.
Step-by-Step
See also: Standing Desk 50 Inch Height: Who Needs It and Why • Standing Desk Height for 5’10”: Your Target Number and How to Dial It In
1. Photograph and unplug the setup (10 minutes)
Before pulling anything apart, take a photo of the back of the desk, TV, or media console. Capture which cable connects to each port, especially HDMI, monitor power, speakers, and networking equipment. Then shut down computers and displays normally before unplugging them. Disconnect chargers and low-voltage devices from the wall.
Do not work on a plugged-in power strip if you can avoid it. Never remove a grounded plug, cut a cord, or open a power adapter to make bundling easier.
2. Sort cables by destination and type (10–15 minutes)
Lay the cords on the floor or a clear surface. Make separate groups for power, video and audio, networking, and USB or charging cables. A practical rule is to keep high-voltage power cords separate from signal cables whenever the layout allows. Crossing at a 90-degree angle is generally preferable to running them tightly parallel for several feet.
Group cables that travel to the same destination, not simply cables that happen to start at the same outlet. For example, one sleeve might run from a power strip to a desk, while another carries monitor and speaker cables from the desk to the equipment.
3. Measure the route and choose the sleeve (5–10 minutes)
Measure the planned path from the outlet or power strip to the equipment, including a gentle curve at each end. Add at least 6 to 12 inches of spare length so the bundle does not pull on plugs when you move a monitor or vacuum nearby.
Measure the combined diameter of the cords, then choose a sleeve that leaves room for expansion. Do not pack a sleeve completely full. Aim for roughly 25 percent empty space, which makes it easier to add a cable and reduces pressure on the existing cords. A 1/2-inch sleeve may fit two or three thin USB or audio cables, but thick power cords can require a 1-inch sleeve or larger.
4. Label both ends before bundling (10 minutes)
Wrap a small label around both ends of every cable. Use specific names such as “left monitor power,” “router,” “game console HDMI,” or “desk lamp,” rather than generic labels like “USB.” If a cable has a removable adapter, label the adapter too.
Leave labels outside the sleeve at both ends. This small step saves time later when a device stops working or when you need to remove only one cable.
5. Clean and prepare the mounting area (5–10 minutes)
Dust the underside of the desk, the rear panel of the console, or the wall area where clips will sit. If the surface is compatible with rubbing alcohol, wipe it and let it dry fully. Avoid placing adhesive clips on damp, dusty, freshly painted, or textured surfaces.
Plan attachment points about every 12 to 18 inches along a horizontal run. Add a clip within 3 to 6 inches of a heavy connector or a place where the bundle changes direction. These supports prevent the sleeve from hanging by the plugs.
6. Insert the cables into the sleeve (10–20 minutes)
Place the sleeve beside the sorted cables and open the split seam with your fingers. Insert one cord at a time, starting with the thickest cable. Keep each cable relaxed and avoid sharp bends. A sleeve should cover the bundled section, not the plug or the first few inches of flexible cable where it needs to move.
For a long run, add the sleeve in sections rather than trying to push an entire bundle through at once. If the seam begins to stretch or the cables resist, stop and use a larger sleeve. Forcing the bundle can damage insulation and makes future access frustrating.
7. Secure the bundle without crushing it (10 minutes)
Use hook-and-loop straps every 12 to 18 inches, or at the sleeve’s recommended intervals. Tighten each strap until the bundle stays in place, then loosen it slightly. You should be able to slide a finger under the strap. Do not use zip ties so tightly that they leave an indentation in the sleeve or cord jacket.
Keep power bricks outside the sleeve unless the manufacturer specifically permits bundling them. Adapters can generate heat, and they need open air around their vents. Do not cover a surge protector’s switch, reset button, or indicator light.
8. Anchor, test, and adjust (10–15 minutes)
Attach the sleeved bundle to the prepared clips, leaving a small service loop—about 6 to 12 inches—near each device. The loop provides enough slack to unplug equipment without pulling on the outlet or connector. Keep plugs and power strips off the floor where spills can reach them, but do not place power strips inside enclosed boxes or tightly packed drawers.
Reconnect one device at a time and test it. Confirm that monitors display correctly, chargers work, speakers receive signal, and networking equipment remains online. After 15 to 30 minutes of normal use, touch the outer surfaces of power adapters and inspect for unusual heat, odor, discoloration, buzzing, or intermittent operation.
Mistakes to Avoid
- Overfilling the sleeve: A bundle that barely fits is difficult to service and can stress cable jackets. Leave approximately 25 percent spare capacity.
- Covering heat-producing equipment: Keep power bricks, transformers, surge protectors, and ventilation openings uncovered.
- Mixing every cable together: Separate power from signal and network cables when practical, particularly on long runs.
- Using adhesive as the only support: Heavy bundles can pull clips off a surface. Use screws or furniture-mounted clips when appropriate and safe.
- Making the route too short: A taut cable can loosen a connector or damage a port. Include service loops at both ends.
- Hiding damage: Sleeves conceal frayed insulation, crushed sections, and bent plugs. Inspect every cord before covering it.
- Creating a trip hazard: A neat bundle is still dangerous if it crosses a walkway. Reroute it along a wall or behind furniture.
How Often
Inspect a sleeved cable setup every three to six months, and whenever you rearrange furniture or add equipment. Dust the outside of the sleeve during regular cleaning. Check clips for loosening and look for crushed sections, discoloration, exposed wire, or a sleeve that has shifted toward a hinge or sharp edge.
Recheck sooner if pets can reach the cables, children play near the setup, or the area experiences frequent unplugging. A quick label and connection check after each equipment change helps prevent mystery cables from accumulating.
When to Call a Pro or Replace
Replace any cord with cracked, melted, cut, flattened, or frayed insulation. Replace a plug that is loose, bent, scorched, or missing its ground pin. Do not wrap damaged sections with ordinary tape and hide them inside a sleeve.
Call a licensed electrician for new outlets, concealed wiring, overloaded circuits, recurring breaker trips, warm wall plates, burning smells, or questions about routing line-voltage wiring through walls. A cable sleeve is an organizing accessory, not a substitute for electrical repairs. Also replace a sleeve that has melted, split along a sharp edge, or no longer protects the cables from a pet or moving furniture.
FAQ
Can I put power and USB cables in the same sleeve?
You can, if the bundle is small, the cords are in good condition, and the sleeve has enough room. For a cleaner and more serviceable installation, keep wall-power cords separate from USB, audio, and network cables when possible. Never bundle a hot power adapter inside the sleeve.
What size cable sleeve should I buy?
Measure the combined diameter of the cords and choose a sleeve with at least 25 percent unused space. A 1/2-inch sleeve suits a few thin cables, while several thick power cords may need 1 inch or more. Buy extra length for curves and a 6- to 12-inch service loop at each end.
Will a split sleeve protect cables from pets?
It can provide a barrier against casual chewing and abrasion, but it is not chew-proof. Use a rigid pet-resistant conduit or relocate the cables if an animal is actively chewing them. Inspect the sleeve and cords frequently for tooth marks.
Should I use zip ties or hook-and-loop straps?
Hook-and-loop straps are usually better for home setups because they can be opened when you add or remove a cable. Zip ties are acceptable for a permanent, low-maintenance bundle only when they are left loose enough that they do not crush the sleeve or cable insulation.
Ready to decide? Our #1 pick for 2026 is the Cable sleeve or split wire loom.
Live price & availability on Amazon.
Related Reviews & Guides





Best Drafting Chairs in 2026: Compared and Ranked
Best Ups Battery Backups in 2026: Compared and Ranked