Last Updated: September 29, 2026
- Before you start: measure and gather
- Step 1: Unplug everything and lower the desk
- Step 2: Mount the tray and power strip to the desktop
- Step 3: Route device cables across the top
- Step 4: Create the single moving bundle
- Step 5: Run a full travel test
- Step 6: Lock in the final layout
- Common mistakes
- FAQ
- Bottom line
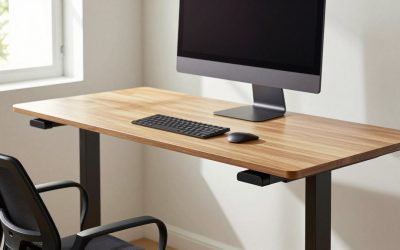
The first time a motorized desk rises with badly routed cables, you usually find out by sound: a monitor cable tensioning, a charger popping out of the wall, or the desk stopping mid-travel because its anti-collision sensor felt resistance. Routing cables for an electric frame is a short, methodical job, and doing it in the right order means you only do it once. This walkthrough assumes the desk is assembled and your gear is on it; set aside about an hour.
📄 In This Review
- Before you start: measure and gather
- Step 1: Unplug everything and lower the desk
- Step 2: Mount the tray and power strip to the desktop
- Step 3: Route device cables across the top
- Step 4: Create the single moving bundle
- Step 5: Run a full travel test
- Step 6: Lock in the final layout
- Common mistakes
- FAQ
- Bottom line
Quick answer: Our top pick in 2026 is the Under-desk tray or basket — our #1 rated choice. See the full ranked comparison, alternatives and buying advice below.
Before you start: measure and gather
Raise the desk to its highest preset and measure from the underside of the top to the floor. Lower it fully and measure again. The difference is your travel, typically 45–65 cm on consumer frames. The cable bundle that drops to the floor must be at least the high measurement plus about 15 cm.
| Item | Purpose | Rough cost |
|---|---|---|
| Under-desk tray or basket | Holds power strip and bricks | $20–$60 |
| Surge-protected power strip | Single power source that rides with the desk | $15–$40 |
| Cable spine or split sleeve | Controls the one moving bundle | $10–$45 |
| Reusable hook-and-loop ties | Bundling without crushing cables | $6–$12 |
| Adhesive cable clips | Routing along the frame and top | $8–$15 |
| Short replacement cables | Removing excess length | $5–$15 each |
Step 1: Unplug everything and lower the desk
See also: Best Roku Streaming Deals Reviewed • Olipop Flavors Ranked: Best Tastes from Worst to Best
Start from zero. Disconnect every cable from the wall and lower the desk to its minimum height so you can work underneath comfortably. Note where the control box and motor cables run; on most dual-motor frames the control box sits under the centre crossbar with short leads to each leg and to the keypad. Those factory cables should be clipped to the frame, not bundled with your power cords, so they never get snagged.
Step 2: Mount the tray and power strip to the desktop
Fix the tray to the underside of the top toward the back edge, clear of the crossbar and the control box. Mount the power strip inside the tray. This is the heart of the method: everything that needs power plugs into a strip that moves with the desk, so the only power cable that crosses the moving gap is the strip’s own lead. Plug the desk’s control box into this strip too; it moves with the desk anyway.
Step 3: Route device cables across the top
Work from the devices down. Monitor power and video cables drop behind the monitors, ideally through the monitor arm’s channels, then go straight into the tray. The dock, lamp and speaker leads follow. Use the shortest cable that reaches with a little slack; a 1 m DisplayPort cable coiled in a tray is tidier than a 3 m one. Bundle each group with hook-and-loop ties, never tight plastic zip ties, which can crush thin USB-C and HDMI cables over time.
Leave a service loop
At each monitor, leave a loop of about 10 cm so you can tilt, swivel or raise the screen on its arm without pulling a connector. Monitor arms move independently of the desk, so this slack is separate from the desk’s travel allowance.
Step 4: Create the single moving bundle
Gather the power strip’s lead and, if needed, an Ethernet cable. Load them into the cable spine or sleeve. Fix the top of the spine under the desk near the tray, and let the bottom rest on the floor close to the wall socket. Keep the bundle behind a leg where your chair will not roll over it.
Step 5: Run a full travel test
Plug the strip into the wall and raise the desk slowly to maximum while watching underneath. Nothing should tighten. Lower it to minimum and check that the spine does not fold into the frame, the chair base or a drawer unit. Repeat with any preset heights you actually use. If the desk stops early, anti-collision may be detecting cable tension; release slack and test again.
Step 6: Lock in the final layout
Once travel is clean, add adhesive clips to hold bundles against the underside of the top, trim excess tie lengths and label the plugs in the strip. Take a photo of the underside; it makes future changes far easier.
Common mistakes
Plugging monitors into a wall socket instead of the desk-mounted strip creates multiple moving cables. Running an extension cord taut from the wall means the socket takes the strain at full height. Zip-tying cables to the frame’s lower leg section is a subtle one: on telescoping legs, the lower stage stays still while the upper stage moves, so anything tied to both will be stretched.
FAQ
Should the control box be plugged into the wall directly?
Either works electrically, but plugging it into the desk-mounted strip removes one moving cable. If your manufacturer specifically recommends a direct wall connection, follow that guidance.
How often should I check the routing?
Every time you add a device, and otherwise every few months. Adhesive clips can loosen in warm rooms, and a single fallen cable can snag during travel.
Bottom line
Measure travel, move all power onto a desk-mounted strip, route device cables into the tray, send one controlled bundle to the floor and test the full range before tidying. Done in that order, a motorized desk stays silent and safe through thousands of height changes.
Ready to decide? Our #1 pick for 2026 is the Under-desk tray or basket.
Live price & availability on Amazon.
Related Reviews & Guides
Ergonomic Chair Comparisons
Task lighting vs ambient lighting